Can different legend processes be used for buttons of different usage frequencies on the same silicone keypad?
- Share
- publisher
- Suey
- Issue Time
- Aug 21,2026
Summary
Yes, you can mix laser etching and silk‑screen printing on the same silicone keypad to save costs. Success depends on compatible sequences, adhesion validation, and a final topcoat. Best for high‑volume products with clear usage skew.
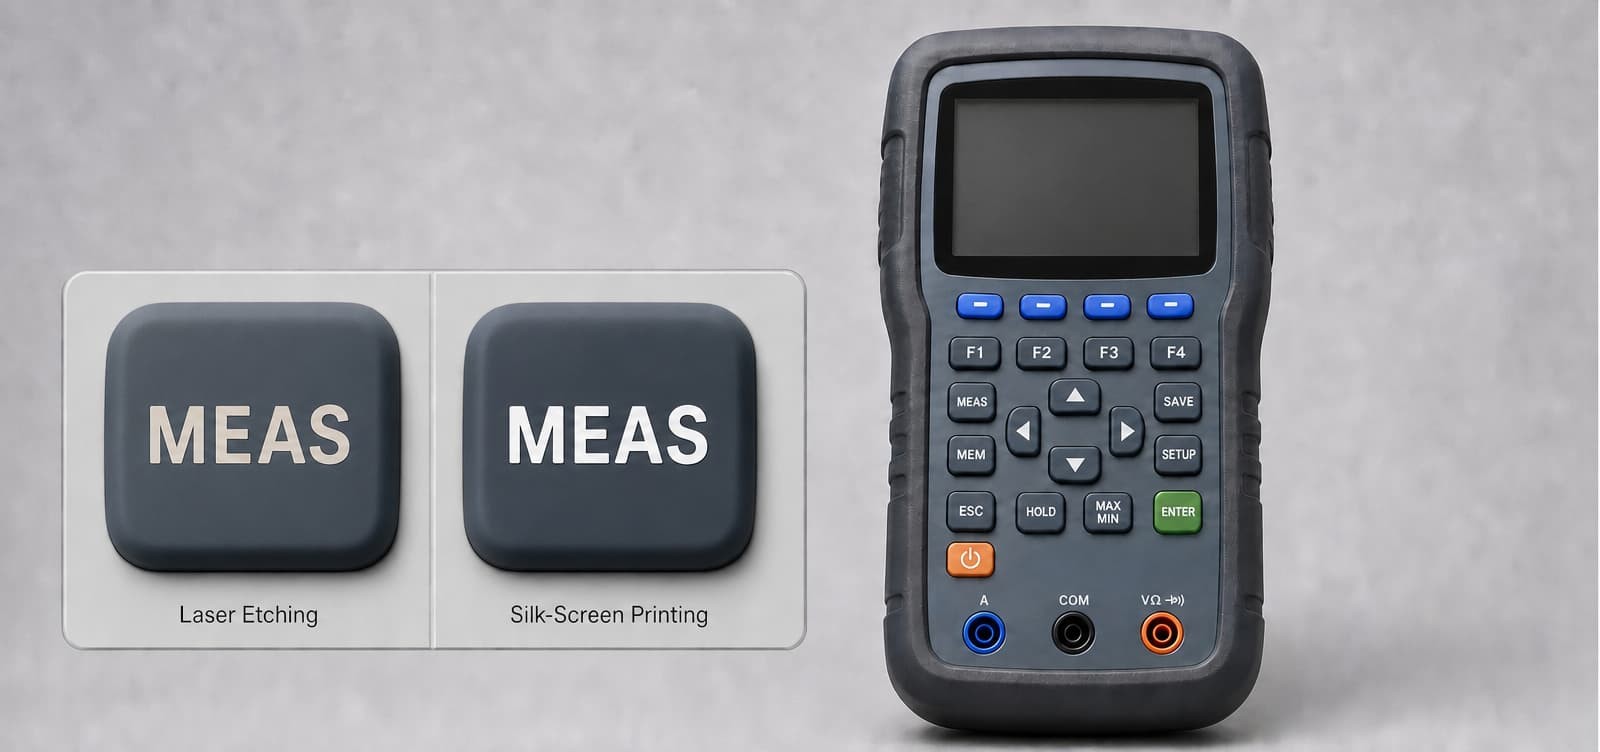
We get this question regularly from design engineers and procurement teams:
“We have one silicone keypad with 12 buttons. Only two of them — ‘Start’ and ‘Stop’ — get pressed hundreds of times a day. The other ten are barely used. After a few months, the legends on those two are gone, but the rest look new. Can we put a premium process only on those two buttons, and use a standard process on the others, to save cost?”
Yes, technically you can. But it’s not as straightforward as it sounds. Here’s what you need to know before you specify this in your next RFQ.
1. Why this question makes sense: usage skew on silicone keypads
On most control panels, a small subset of buttons does most of the work. The “Enter” key on a payment terminal, the “Confirm” on a medical handheld, the “Emergency Stop” on industrial equipment — these see 10× or even 50× the actuations of their neighbours.
If you apply the same high‑durability process to all buttons, you over‑engineer the rarely used ones. If you use a standard process everywhere, the critical ones fail early. So the idea of splitting processes is logical — but the execution has constraints.
The main constraint is that a silicone keypad is molded as a single piece. All buttons share the same substrate. You can’t physically separate them. Any coating, printing, or etching step applied to the whole part will affect every button unless you mask selectively — and masking 3D silicone parts is expensive and labour‑intensive.
So the question becomes: which process combinations are physically compatible on the same keypad, and how do you sequence them?
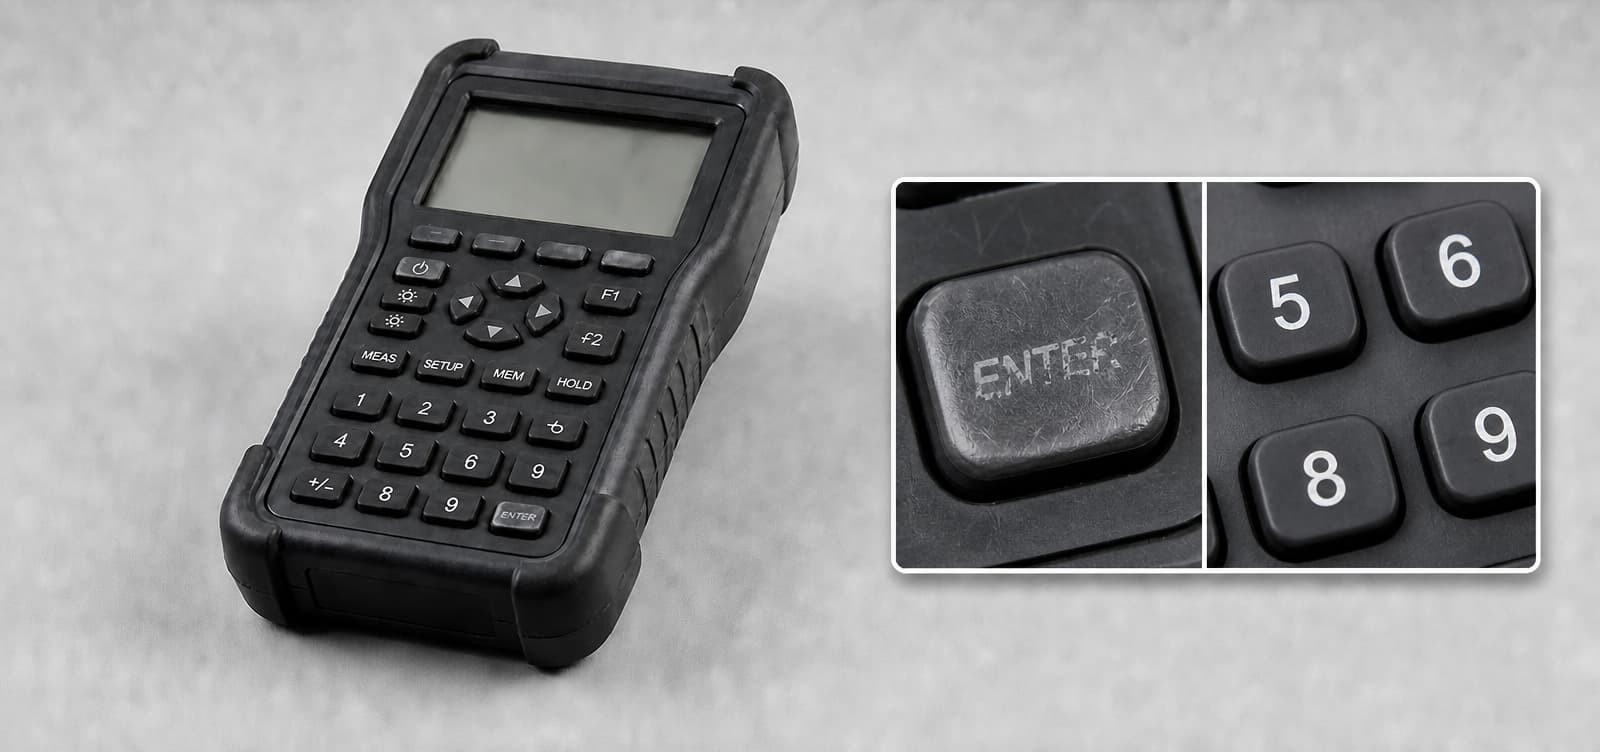
2. Feasible mixed‑process combinations for the same silicone keypad
Based on what actually works in production, here are three viable approaches:
| Approach | High‑use buttons | Low‑use buttons | Production sequence | Durability gap |
|---|---|---|---|---|
| A. All silk‑screen printed, selective extra coating | Silk-screen print + manually brush/thin‑spray PU coat only on those buttons | Silk-screen print only | Print all → mask other buttons → apply coating to selected ones | Low‑to‑medium (coating adds 2‑3× life) |
| B. Laser on high‑use, silk‑screen print on low‑use | Spray coat whole keypad → laser etch high‑use buttons | Silk‑screen print remaining buttons with ink that adheres to the spray coating | Spray coat → laser etch high‑use → silk‑screen print low‑use (with compatible ink) → clear topcoat all | Large (laser: 1M+ cycles, silk‑screen print: 200‑300k) |
| C. Laser on high‑use, no legends on low‑use (or use overlays) | Spray coat → laser etch | Leave unmarked or use adhesive film overlays | Spray coat → laser etch → (optional overlay) | Extreme, but only if low‑use buttons don’t need legends |
Approach A is the simplest and least risky. You just add a manual coating step after printing, applied only to the critical buttons. It’s not highly automated, but for small to medium volumes it works well and adds minimal cost.
Approach B gives the best durability separation. The key challenge is finding a silk‑screen printing ink that bonds reliably over the spray coating used for laser etching. We’ve run adhesion tests (cross‑hatch + tape pull) to validate this — not all inks work, so you need to test your specific combination.
Approach C is rare, but occasionally used for buttons that only have icons that are already understood (e.g., power symbol) or where a separate label can be attached.
3. When does mixed processing actually save money on silicone keypads?
Mixed processing adds setup complexity — more tooling, more programming, more inspection points. So it’s not automatically cheaper. You have to run a rough cost‑benefit:
- Annual volume > 50,000 units and high‑use buttons < 20% of total → mixed processing usually saves 15‑25% vs. applying the premium process to all buttons.
- Annual volume < 10,000 units → the setup overhead often wipes out the material savings. Just use the premium process everywhere — simpler and less risk of production errors.
- Warranty cost factor — if a single legend failure triggers a full keypad replacement under warranty, the savings from mixing processes become negligible. Factor in the cost of returns and reputation damage.
In our experience, the sweet spot is when you have a clear usage skew and your volumes are moderate to high. We’ve seen customers save up to 22% on keypad costs by using Approach B with careful process validation.
4. Real case: selective laser etching on a medical handheld silicone keypad
A medical device company had a handheld controller with 8 buttons. Two — “Confirm” and “Cancel” — were used over 500 times per shift. The other six were occasional. Their existing silk‑screen printed keypad failed on those two buttons within 3 months.
They wanted to upgrade only those two to laser‑etched legends, while keeping silk‑screen printing for the rest.
We proposed this sequence:
- Mold the full silicone keypad as usual.
- Apply a uniform black spray coating over the entire keypad.
- Laser‑etch “Confirm” and “Cancel” on the two buttons — the laser removes the coating, exposing white silicone underneath.
- Silk‑screen print the other six legends using a silicone ink specially formulated to adhere to the black coating. We verified adhesion with cross‑hatch and tape tests.
- Apply a thin clear PU topcoat over all buttons — this protects both the laser‑exposed silicone and the printed ink.
Results:
- The laser‑etched buttons passed 1.2 million actuations in our Taber abrasion test without visible fade.
- The silk‑screen printed buttons passed 250k cycles, which was more than enough for their occasional use.
- Total cost increase over the all‑silk‑screen printed version: only 18%, far less than the cost of replacing the entire unit under warranty (which had happened multiple times).
The critical lesson: we spent extra time upfront to verify ink‑to‑coating adhesion. Without that, the silk‑screen printed legends on the other buttons could have peeled. Validation samples are non‑negotiable when you mix processes.
5. What to specify in your RFQ for mixed‑process silicone keypads
If you decide to go this route, your specification document must be crystal clear. We recommend including:
- A drawing with button numbers — mark which positions require the premium process.
- Process definitions per group — e.g., “Buttons #1 and #2: spray coating + laser etching + PU topcoat; Buttons #3‑#8: silk‑screen printing + same PU topcoat.”
- Separate durability requirements — “#1/#2: ≥1,000,000 cycles per ASTM D4060; #3‑#8: ≥200,000 cycles.”
- Adhesion test requirement — specify cross‑hatch (ASTM D3359) and tape pull for the silk‑screen printed legends over the coating.
- Sequence documentation — ask the supplier to provide their production sequence and masking/blocking plan (if any).
- First‑article samples — require complete test reports for all button groups before mass production.
Also, don’t forget the final topcoat — it’s a great equaliser. A uniform clear coat over all buttons after marking significantly improves the durability of the standard‑printed legends, closing the gap and reducing risk.
So, can you use different processes on different buttons of the same silicone keypad?
Yes — but only if you choose compatible sequences, validate adhesion, and accept the added setup cost. For high‑volume products with a clear usage skew, this is a smart way to save money without compromising reliability on critical buttons.
The safest way is to work with a supplier that has in‑house control over all secondary processes — coating, laser, silk‑screen printing, and topcoating — so they can sequence and test everything without finger‑pointing between subcontractors.