How to Check Silicone Heat Transfer Patch Adhesion After Pressing?
- Share
- publisher
- FromRubber
- Issue Time
- Oct 12,2026
Summary
A patch that looks correct on the press table has not yet proved that it will stay attached. This article separates immediate post-press inspection from durability testing, walks through a seven-stage check covering edge bonding, centre bonding, patch appearance, fabric condition and sample consistency, and explains how to read the failure interface.
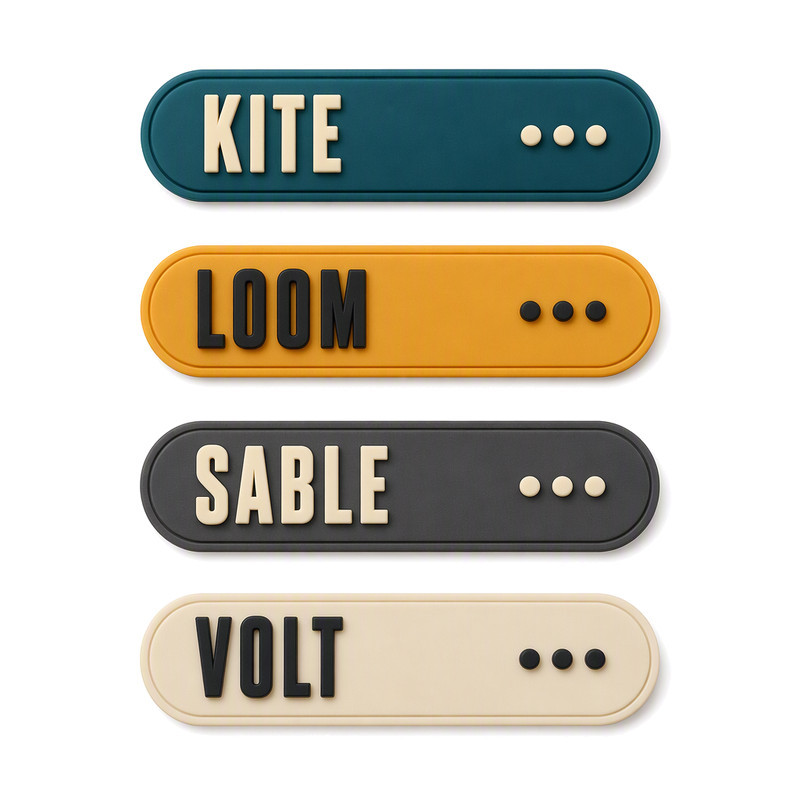
A patch that looks right on the press table has not yet proved anything
The awkward part of silicone heat transfer patch adhesion is that the failure is usually invisible at the moment of inspection. The patch sits flat, the perimeter feels closed, the colour is even — and forty-eight hours later one corner is standing up, or the patch separates in the wash while the fabric around it is untouched.
That gap between appearance and adhesion is why inspection has to be a staged process rather than a single glance. A visual check answers whether the application looks correct. It does not answer whether the bond will hold when the garment is pulled over a shoulder and washed a dozen times.
This article sets out what to inspect, in what order, and how to interpret what you find, so that a patch approval decision rest on something more repeatable than "it seems firmly attached".
What to check after applying a silicone heat transfer patch
Edge bonding, all the way round
Work the full perimeter under consistent light and look for lifted corners, loose sections, visible gaps and areas where the edge appears to sit on the surface rather than into it. Early edge lifting is the most informative defect in the whole inspection, because it usually appears before the patch separates anywhere else.
Centre bonding
Check for localised separation, bubbles, wrinkles or patches of several millimetres that look as though they never made contact. Surface appearance is a poor guide to what is happening under a solid or raised emblem, which is why the centre is inspected separately from the perimeter rather than assumed from the outline.
Patch appearance and shape
Look for distortion, cracking, surface damage, colour change and loss of fine detail. These are appearance defects rather than adhesion defects, but they frequently travel together, and both have to be recorded separately so that the corrective action is aimed at the right variable.
Fabric condition
The fabric has to be inspected in the same pass: discolouration, scorching, glazing, shrinkage, a change in texture or a permanent impression around the outline. A patch that is perfectly bonded but has marked the fabric is a fail, not a pass with a note.
Consistency across several samples
One good garment proves that the process can work; it does not prove that it does. When validating a set-up, inspect more than one sample and compare positions — sleeve against body, single layer against a seam, one fabric lot against the next.
Read the perimeter and the centre as two separate zones
Strip and capsule patches with small raised dots are a good example of why. The dots tell you whether the raised detail formed correctly, while the outline tells you whether the perimeter bonded. A run can pass on detail and fail on the edge, and the two have different causes.
When we set up an inspection sheet with a customer, the perimeter, the centre and the fabric under the outline are recorded as separate line items. It takes two extra minutes per sample and it removes most of the ambiguity from a later dispute.
A step-by-step method for checking adhesion after pressing
Step 1 — Confirm the application record first
Before touching the sample, confirm the patch construction, the fabric identity, the press used, the temperature, the pressure, the dwell time and any required cooling or post-press handling. As a sanity check, Published supplier instructions for silicone transfer labels commonly work in the region of 160 °C (320 °F) held for about 15 seconds with firm pressure, followed by complete cooling before handling (published application guidance from a transfer supplier); treat that as a starting point for testing on your own fabric, not a universal figure. If the record does not match the agreed instruction, the inspection is measuring an unknown process.
Step 2 — Let the sample reach the stated inspection condition
Timing should follow the product-specific instruction. Some constructions are handled immediately; others are assessed after a defined cooling period. Applying one habit across all constructions is a common source of false results.
Step 3 — Visual inspection under fixed lighting
Examine the entire perimeter and the centre with the light source in the same position each time, and record lifted edges, gaps, wrinkles, bubbles, distortion and fabric damage. Photographs taken from the same angle make the record comparable between shifts.
Step 4 — A controlled manual check, where appropriate
A light, consistent touch around the perimeter can reveal an obviously loose edge. Fingernails, sharp tools and uncontrolled peeling reveal very little: they destroy the sample and produce a result nobody can compare with the previous batch. A manual check is a screening step, never the approval.
Step 5 — Run an adhesion test that matches the product
The method depends on the patch construction, the fabric, the product requirement and any applicable customer or industry specification. Where a peel or pull test is used, agree the specimen preparation, the pulling direction, the rate, the conditioning and the reporting format before the first specimen is cut.
Coated and laminated textiles are commonly characterised this way. ISO 2411 describes a T-peel arrangement in which 75 mm wide specimens are separated at 100 mm/min, with peel strength reported as mid-point, mean and extreme values; accredited laboratories perform the same determination as DIN EN ISO 2411 and can also test specimens after climatic or hydrolytic pre-conditioning. One test method does not suit every patch, so match the method to the construction rather than to habit.
Step 6 — Follow with washing or other durability testing
Immediate adhesion and durability are two separate results. Define the washing, drying, stretching or environmental conditions from how the garment is used, and record the change in adhesion and appearance afterwards. ISO 6330 is a common reference for domestic washing and drying procedures, and accelerated laundering methods such as AATCC TM61 are widely used in textile research for the same purpose — see the AATCC summary of test methods used in published studies. AATCC TM61 states that one 45-minute accelerated laundering test roughly approximates the effect of five typical hand or home launderings, which is a useful equivalence to have in writing when a wash protocol is turned into a cycle count. Conditioning before mechanical testing is defined in ISO 139.
Step 7 — Compare against criteria agreed before testing
Pass, fail, defect type, test conditions and sample identification, all recorded against limits that were set in advance. Approval based on a subjective description cannot be defended later, and it cannot be repeated by another inspector.

A written sequence beats an experienced eye
Most inspection failures we see are not judgement errors. They are steps that were skipped because the person doing the check had done it a thousand times and knew what a good patch looks like.
Turning the seven stages into a one-page sheet with tick boxes changes that. The record also becomes the evidence base when a customer complaint arrives two months later and the question is whether the same conditions still apply.
How to interpret common adhesion results
The failure interface matters as much as the failure itself. Separation at the fabric face, inside the patch structure and inside the bonding layer point at three different problems, and the action to take differs accordingly.
| Observed result | Possible meaning | Additional checks | Recommended action |
|---|---|---|---|
| All edges remain flat after pressing | Application looked correct at the time of check | Whether a durable-check stage exists | Continue to washing or another durability evaluation before approving |
| One corner lifts during handling | Local contact loss or perimeter weakness | Platen level at that position, seam or fold under the corner, outline geometry | Re-press under the recorded conditions and inspect the same corner; if it repeats, review construction and outline |
| Patch detaches during a defined adhesion test | Bond strength below the agreed requirement | Test method, specimen preparation, conditioning, actual interface conditions | Repeat the test on additional specimens and compare with the approved sample's result |
| Patch passes initially but separates after washing | Delayed bonding failure, laundering exposure, or marginal adhesion | Wash conditions against the tested method, fabric finish, detergent | Add a pre-production wash evaluation and re-approve the sample set |
| Patch stays attached but the fabric is damaged | Excessive heat or dwell for that fabric | Actual interface temperature, fabric heat sensitivity, press dwell | Treat as a fail; correct the process before evaluating adhesion again |
| Adhesion differs between fabric lots | Fabric finish or construction variation | Dye lot, finishing recipe, supplier change | Re-validate on each new lot rather than extending the previous approval |
| Silicone separates from another layer inside the patch | Internal delamination, not a fabric bond problem | Where the failure face sits within the patch structure | Refer the sample back to the patch manufacturer with the failure face clearly identified |
Mixed sample sets expose variation that single-shape runs hide
When one application pass contains circles, hexagons and capsules of different sizes, the inspection has to compare like with like. A small hexagon and a wide capsule cannot be judged against the same perimeter expectation, even when they share the same fabric and settings.
For approval purposes we group the record by shape and size. It makes the data usable and it stops a passing large patch from masking a marginal small one.

Mistakes that quietly weaken an adhesion check
Relying on the visual result alone
A clean surface proves the application looked correct, not that the bond is adequate.
Pulling every patch by hand
Uncontrolled force gives results that cannot be compared between operators, shifts or batches.
Testing a single sample
Sample variation is real. A representative plan needs more than one specimen before a set-up is accepted.
Carrying results across fabrics
A result obtained on one fabric does not transfer to a different construction, even within the same garment style.
Stopping before the wash stage
Immediate adhesion and post-laundering adhesion are different measurements, and buyers are affected by the second one.
Changing several press variables at once
When temperature, pressure and dwell all move together, the cause of the improvement — or the new failure — is unknown.

Keep a reference set, not just a reference photograph
Photographs are useful, but a physical approved sample settles an argument in seconds. Keeping one per colour and per size, sealed and labelled with the application settings, turns inspection into a comparison against something real.
That reference set is also what makes it possible to detect a slow drift — a slight change in finish, a softer edge — long before it becomes a customer complaint.
Building an adhesion inspection plan with your patch manufacturer
Define the application requirements
Fabric composition, garment type, intended use, washing conditions and the appearance expected after wear. These five items set everything else, including which test is even relevant.
Agree the methods and the acceptance limits
Inspection timing, test method, sample quantity, conditioning requirements and the limits that count as a pass. Where a standard or buyer-defined method applies, use it rather than an in-house habit.
Keep sample and batch records
Approved samples, artwork versions, label specifications, application parameters and test reports together in one place, so that a recurring defect can be traced instead of re-diagnosed.
Re-check after relevant changes
New fabric, revised construction, different bonding material or a different press all justify revalidation, even when the patch itself has not changed.
Frequently asked questions
Can I check silicone heat transfer patch adhesion immediately after pressing?
A visual screening check is usually possible straight away, but the timing for a meaningful adhesion assessment depends on the instruction supplied for that construction. Follow the product-specific timing rather than a general rule.
Is pulling the patch by hand a reliable adhesion test?
It can expose an obviously loose edge, but it does not produce a controlled or quantitative result, and it is not comparable between operators. Treat it as a screening step only.
Why does a patch pass inspection and then peel after washing?
Delayed bonding failure, fabric compatibility, application conditions and laundering exposure are all possible. The wash stage is a separate evaluation and has to be planned and recorded as one.
Should adhesion testing be done on every type of fabric?
Every materially different substrate or fabric finish should be evaluated as appropriate to the risk and the product requirement. A new fabric is a new case, even when the patch is unchanged.
What should a silicone patch inspection report contain?
Sample identification, fabric details, application parameters, test method, conditioning, observations, measured results where available, and the acceptance decision. Without the parameters, a result cannot be reproduced.
Sources and further reading
- ISO 2411 — Rubber- or plastics-coated fabrics — Determination of coating adhesion, described by the accredited testing laboratory FILK Freiberg, including testing after climatic or hydrolytic pre-conditioning: filkfreiberg.de — DIN EN ISO 2411
- ISO 2411 — T-peel test configuration, specimen width and test speed as described by Instron: instron.com — ISO 2411 coating adhesion
- ISO 6330:2021 — Textiles — Domestic washing and drying procedures for textile testing: iso.org/standard/75934.html
- ISO 139:2005 — Textiles — Standard atmospheres for conditioning and testing: iso.org/standard/35179.html
- AATCC — Textile research using AATCC test methods, including AATCC TM61 for colourfastness to laundering: aatcc.org — AATCC test methods in research
- AATCC TM61 — Test Method for Colorfastness to Laundering: Accelerated (one 45-minute test approximates five hand or home launderings): members.aatcc.org — TM061 test method
- Published application guidance for silicone transfer labels (heat press around 320 °F / 160 °C for 15 seconds): qualitywovenlabels.com — silicone labels
Use defined criteria, not appearance alone
Visual checks, a controlled adhesion evaluation, a durability stage and documented acceptance criteria are four different things, and an approval needs all four. The test itself should be selected to match the patch construction and the fabric it is applied to, and the results only become useful when they sit next to the parameters that produced them.
FromRubber (Dongguan Bohao Electronic Technology Co., Ltd.) manufactures custom silicone heat transfer patches and silicone labels, and works with customers on sample evaluation and application guidance for their specific fabric and washing conditions. If a batch has produced an ambiguous result, send the pressed sample together with the application record and the fabric used — the failure face usually answers the first question quickly: nani@fromrubber.com or karl@fromrubber.com, WeChat and WhatsApp +86 18676210913. Constructions are listed under custom heat transfer patches and custom rubber patch products, and a related failure pattern is discussed in why silicone heat transfer labels peel on polyester.
Related reading in this series
Why Does a Silicone Heat Transfer Label Peel After Washing? · How Does Pressing Temperature Affect a Silicone Heat Transfer Label? · How to Choose a Silicone Label for Knitted Garments? · Silicone Patch for Seamless Sportswear: What Design Factors Matter?
About the figures and the review behind this article
Figures quoted here are published industry references rather than measurements from our own production: care and treatment classes follow the ISO 3758:2023 symbol system, the laundering equivalence comes from AATCC TM61, the peel geometry from ISO 2411, and the application and thickness ranges from published conversion-supplier documentation.
Editorial review by FromRubber engineering. FromRubber (Dongguan Bohao Electronic Technology Co., Ltd.) has moulded silicone components in Dongguan since 2010, runs 32 compression moulding machines across two plants, works to ISO 9001:2015, ISO 14001:2015 and IATF 16949:2016 certified systems, and has operated a dedicated silicone fabric-label and heat transfer label division since 2023.