How to Design a Custom Rubber Button: Checklist for Shape, Texture, and Tactile Feedback
- Share
- publisher
- Suey
- Issue Time
- Nov 11,2025
Summary
How to specify a custom rubber button: dome height, web thickness, travel and skirt angle, the five numbers that define tactile feedback, texture and legend choices that survive cleaning, and a pre-tooling checklist that avoids the most common production failures.
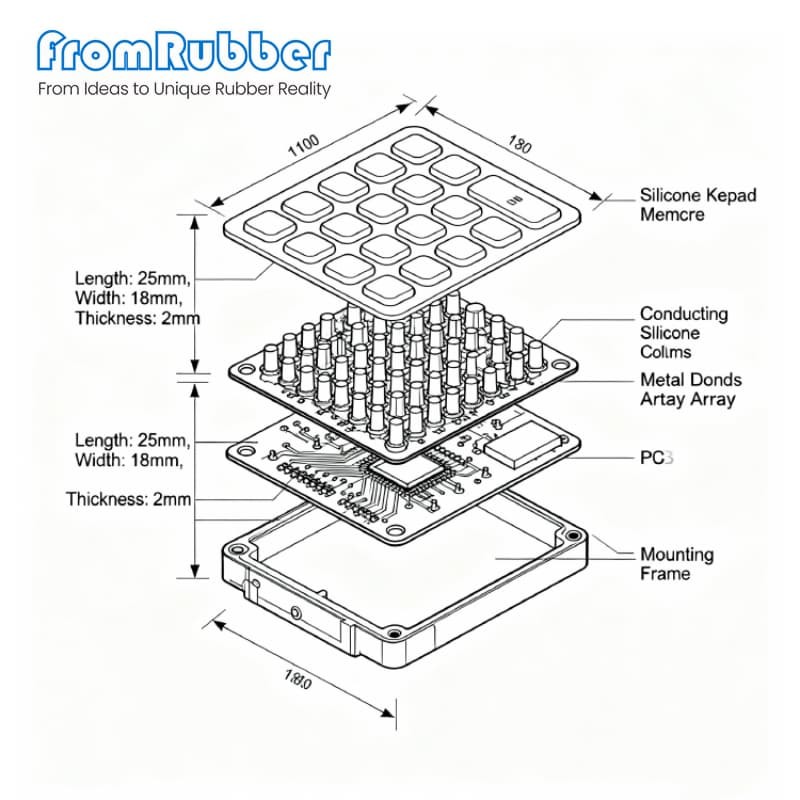
A button either feels like a button or it does not, and the decision is made in three places on the drawing: the dome, the web under the key, and the gap that sets travel. Everything else, including colour, legend and finish, is visible. Those three are the part the user judges with a thumb.
This is the working checklist we use when a custom rubber button is specified from scratch, including the numbers to put on a drawing so that the second mold and the tenth mold feel the same.
What Actually Determines How a Custom Rubber Button Feels?
The direct answer: dome geometry, web thickness and travel. Actuation force is the result of those three, not an independent input. If you specify only a force value, the molder has no way to reproduce the feel on a second tool, because several geometries can produce the same peak force with completely different force curves.
The distinction that matters is between peak force and the shape of the curve. A button that rises steeply to 300 gf and collapses instantly reads as crisp. A button that reaches the same 300 gf slowly, then mushes through 1 mm of travel, reads as cheap, even though the number on the test report is identical.

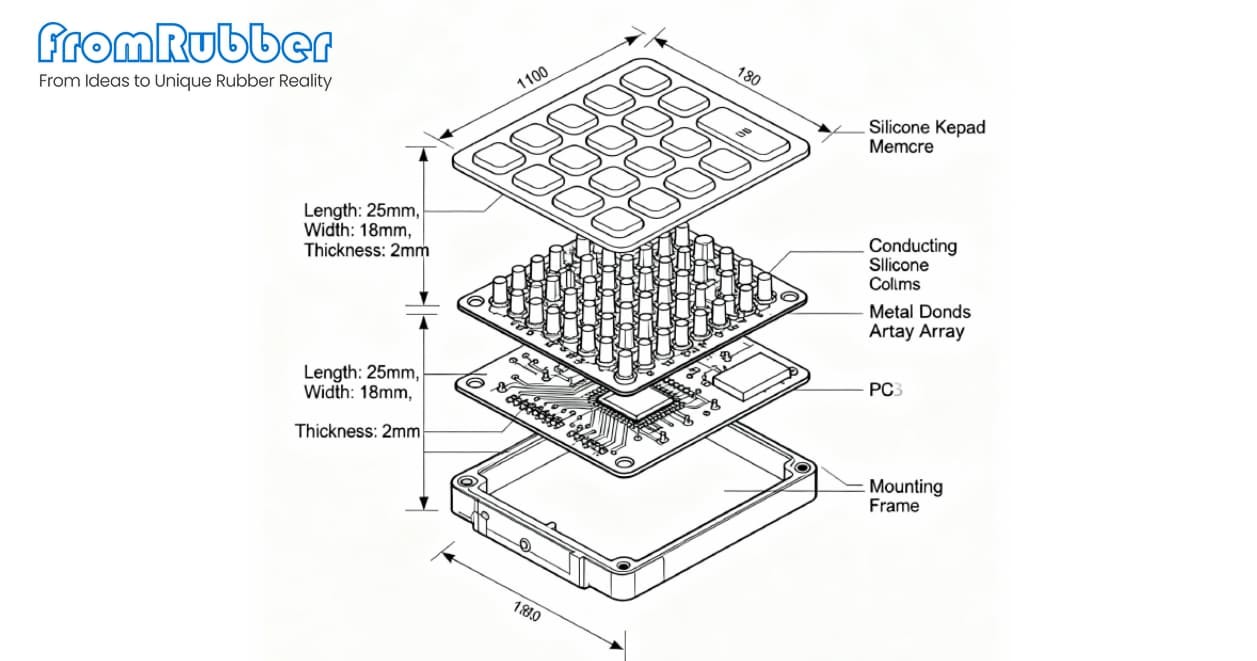
Custom Rubber Button Geometry: Dome, Web and Skirt
Four dimensions carry most of the behaviour. They interact, so treat them as a set rather than tuning one at a time.
Where a design has a large key next to a small one, the web under the large key usually has to be thicker or the dome shallower, otherwise the same thumb pressure that feels right on the small key bottoms out the large one.
| Dimension | Typical design range | Effect when it changes |
|---|---|---|
| Dome height | 0.6 to 1.2 mm above the web | Taller domes give a longer, softer collapse; shallow domes snap harder |
| Web thickness | 0.3 to 0.6 mm | Thicker webs raise force and slow the return; thin webs feel light but tear at the root |
| Key travel | 1.0 to 1.8 mm for a hand-held panel | Below about 0.8 mm the user loses confirmation; above 2 mm the key feels loose |
| Skirt angle | 10 to 25 degrees from vertical | Controls lateral stability; too vertical a skirt lets the key rock |
How Do You Write Tactile Feedback Into a Custom Rubber Button Specification?
Put five numbers on the drawing and one curve on the test report. The five numbers are actuation force, contact force, travel to actuation, total travel and return force. The curve is the force-displacement trace captured during first article inspection.
- Actuation force is the peak the user must overcome. For a thumb-operated handset panel, 250 to 400 gf is a common target; for a membrane-style flat panel, 150 to 250 gf.
- Contact force is what remains at the carbon pill when the key bottoms out. If it is too low, contact resistance becomes unstable and keys start to double-press or drop inputs.
- Travel to actuation should sit at roughly 40 to 60% of total travel, which is what produces the "click" sensation rather than a bottom-out.
- Return force must be high enough to lift the key against cold, gloved fingers; a key that returns slowly on a cold morning is a field complaint, not a lab finding.
If your application needs conductive switching rather than a mechanical push, the pill geometry and the carbon loading matter as much as the dome. The principles are set out in our article on conductive silicone keypad buttons.
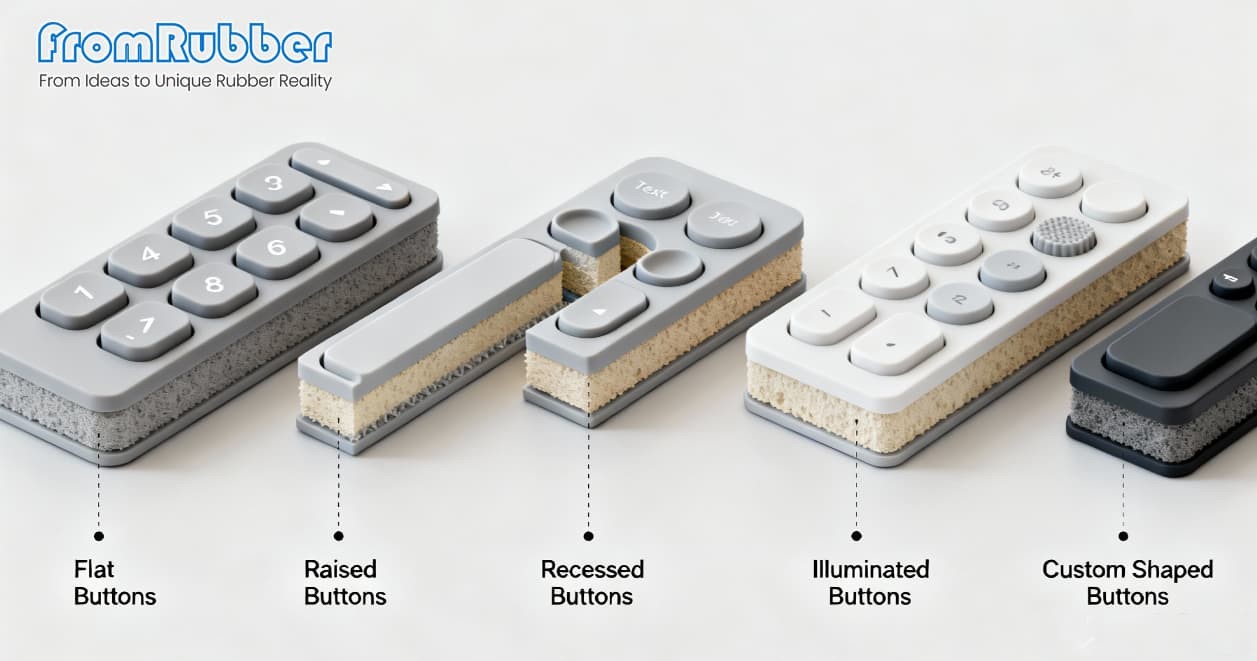
The Custom Rubber Button Design Checklist
Run this list before the tool is cut. Each line is a decision that is cheap now and expensive after the first shot.
- Key layout drawn at final scale with centre distances, plus the panel outline and mounting features.
- Actuation force, contact force, travel to actuation and total travel written as ranges, not single values.
- Web thickness and dome height specified per key size, not as one global value.
- Legend method chosen with a cleaning chemical in mind, and an abrasion test agreed for first article.
- Surface finish specified by sample or Ra range.
- Operating temperature and cleaning regime stated, so the silicone grade is not chosen by habit.
- Backlight requirement stated, including whether light must pass through the legend only or the key body.
- Cosmetic acceptance criteria agreed in writing, because "no flash" is not an inspection standard.
Where Custom Rubber Button Designs Fail in Production
Three failures account for most of the rework we see on transferred designs. Keys that sit too close to the panel edge tear at the web, because the edge provides no compliant material to absorb the press. Legends printed over a sharp corner break down first, because the ink cannot stretch with the substrate. And keys specified with a flat top and a hard skirt rock sideways, which shows up as intermittent contact rather than as a visible defect.
All three are drawing problems. None of them are solved by a stricter inspection plan, which is why a design review before tooling is the highest-return hour in the project.
Understanding Rubber Button Fundamentals
Before diving into the design specifics, it's essential to understand the basic components and materials used in rubber button manufacturing. Rubber buttons, typically made from silicone rubber, consist of several key elements:
Figure 2: Anatomy of a rubber button showing key structural componentsThe primary material for most custom rubber buttons is silicone rubber, chosen for its excellent physical properties including temperature resistance, durability, and flexibility. Silicone rubber can be formulated in various hardness levels (typically 30-80 Shore A) to achieve different tactile responses and can be colored to match specific brand requirements.
Key Material Considerations
| Material Property | Design Impact | Common Applications |
|---|---|---|
| Silicone Hardness (Shore A) | Affects tactile feedback and activation force | Medical devices (softer), Industrial controls (harder) |
| Conductive Carbon Pill | Enables electrical contact with PCB | Remote controls, Electronic instruments |
| UV Resistance | Prevents degradation from sunlight exposure | Automotive controls, Outdoor equipment |
| Temperature Range | Determines operational environment limits | Industrial controls, Automotive applications |
| Chemical Resistance | Ensures durability in harsh environments | Medical devices, Laboratory equipment |
Designing Button Shape: Form Follows Function
The shape of your rubber button significantly impacts both aesthetics and usability. Well-designed button shapes guide user interaction, prevent accidental presses, and contribute to overall product ergonomics.
Figure 3: Various rubber button shape designs with dimensional considerations for optimal performanceShape Design Checklist
Shape Design Considerations
- Ergonomic Contouring: Design shapes that fit naturally with finger anatomy. Concave surfaces often provide better contact and comfort than flat surfaces.
- Size and Spacing: Ensure adequate button size (minimum 8mm diameter for fingertip operation) and spacing (minimum 2mm between buttons) to prevent accidental presses.
- Travel and Actuation: Design appropriate travel distance (typically 0.3-1.0mm) and consider the relationship between button shape and required actuation force.
- Visual Differentiation: Use distinct shapes for different functions (e.g., circular for standard buttons, rectangular for directional controls, unique shapes for critical functions).
- Manufacturing Constraints: Consider draft angles (1-3° typically required), undercuts, and other manufacturing limitations when finalizing shapes.
| Button Shape | Best Applications | Design Considerations |
|---|---|---|
| Circular/Round | Standard functions, numeric keypads | Most versatile shape, easy to manufacture, familiar to users |
| Rectangular/Square | Directional controls, function keys | Good for alignment, may require rounded corners for comfort |
| Oval/Elliptical | Ergonomic applications, toggle functions | Comfortable finger contact, distinctive appearance |
| Custom Shapes | Brand-specific designs, safety-critical functions | Enhances brand identity, may increase tooling costs |
| Concave/Convex | High-use applications, blind operation | Improved tactile feedback, ergonomic benefits |
Mastering Surface Texture
Texture plays a crucial role in both the aesthetic appeal and functional performance of rubber buttons. The right texture can enhance grip, provide visual interest, and help users distinguish between different buttons without looking.
Figure 4: Different rubber button surface textures and their appropriate applicationsTexture Design Checklist
Texture Selection Factors
- Grip Enhancement: Textured surfaces improve finger traction, especially important in medical or industrial environments where users may wear gloves.
- Visual Appeal: Texture can create visual interest and help integrate buttons with overall product aesthetics.
- Tactile Differentiation: Use different textures to help users distinguish between button functions without visual confirmation.
- Durability Considerations: Finer textures may wear more quickly than coarser patterns in high-use applications.
- Manufacturing Method: Consider whether texture will be molded-in, laser-etched, or applied as a secondary operation.
| Texture Type | Surface Finish | Typical Applications |
|---|---|---|
| Smooth/Glossy | High-shine, reflective surface | Consumer electronics, premium appearance requirements |
| Matte/Satin | Low-glare, slightly textured | Medical devices, industrial controls where glare reduction is important |
| Light Grip | Fine pebble or crosshatch pattern | General purpose applications, good finger traction |
| Heavy Grip | Coarse patterns, pronounced texture | Industrial environments, gloved operation, high-moisture conditions |
| Custom Patterns | Brand-specific or application-specific designs | Brand differentiation, specialized applications |
Optimizing Tactile Feedback
Tactile feedback is arguably the most critical aspect of rubber button design, directly impacting user experience and perception of quality. Well-designed tactile response provides confirmation of activation without requiring excessive force.
Figure 5: Rubber button tactile feedback mechanisms and force response diagramsTactile Feedback Design Checklist
Tactile Response Considerations
- Actuation Force: Design appropriate force requirements (typically 100-300g) based on user demographics and application context.
- Travel Distance: Optimize button travel (typically 0.3-1.0mm) to balance responsiveness with physical feedback.
- Snap Ratio: Aim for appropriate snap ratio (tactile peak force divided by initial force, typically 1.3-2.0) to create satisfying tactile response.
- Audible Feedback: Consider whether an audible click is desirable for your application and design accordingly.
- Consistency: Ensure consistent tactile response across all buttons in an array to maintain quality perception.
| Tactile Profile | Force Characteristics | User Experience |
|---|---|---|
| Soft Response | Low actuation force, minimal snap ratio | Quiet operation, minimal physical feedback, premium feel |
| Medium Response | Moderate force, balanced snap ratio | Distinct feedback without being harsh, versatile for most applications |
| Crisp Response | Higher force, pronounced snap ratio | Definite confirmation, suitable for industrial or gloved use |
| Two-Stage Response | Dual tactile events in single press | Advanced functionality, specialized applications like camera shutters |
| Linear Response | Consistent force throughout travel | Smooth operation, typically used for non-switching applications |
The Complete Design Process
Successfully designing custom rubber buttons requires a systematic approach that balances user needs, technical requirements, and manufacturing constraints. Follow this proven process to ensure optimal results.
1. Requirements Analysis
Define user needs, environmental conditions, operational requirements, and aesthetic goals. Document force requirements, expected lifecycle, and any regulatory compliance needs.
2. Conceptual Design
Create initial concepts exploring different shapes, textures, and tactile approaches. Develop 2-3 distinct directions for evaluation against requirements.
3. Detailed Engineering
Develop complete 3D models with proper draft angles, wall thickness, and manufacturing considerations. Create detailed drawings with tolerances.
4. Prototype and Testing
Fabricate functional prototypes using silicone molding. Conduct rigorous testing for tactile response, durability, and environmental performance.
5. Design Refinement
Incorporate feedback from prototype testing. Fine-tune shapes, textures, and tactile characteristics based on user feedback and performance data.
6. Production Tooling
Create production molds based on finalized design. Implement quality control procedures to ensure consistency in mass production.
Common Design Challenges and Solutions
Even with careful planning, rubber button design presents specific challenges. Understanding these common issues and their solutions can save time and prevent costly revisions.
Figure 6: Common rubber button design challenges and effective solutions| Design Challenge | Potential Impact | Recommended Solution |
|---|---|---|
| Inconsistent Tactile Feel | Poor user experience, perceived as low quality | Optimize dome design and material thickness; ensure consistent manufacturing |
| Premature Wear | Reduced product lifespan, failure in critical applications | Select appropriate material hardness; add protective coatings for high-wear areas |
| Sticking or Slow Return | Frustrating user experience, functional failure | Increase return spring force; optimize venting; reduce surface adhesion |
| Accidental Activation | User errors, potential safety issues | Increase actuation force; add physical barriers; improve spacing between buttons |
| Difficulty in Cleaning | Hygiene concerns, particularly in medical applications | Design seamless surfaces; eliminate crevices; select cleanable materials |
Material Selection Guide
Choosing the right rubber material is critical to achieving the desired performance characteristics. Different formulations offer varying properties suited to specific applications and environments.
| Material Type | Hardness Range (Shore A) | Key Properties | Best Applications |
|---|---|---|---|
| Standard Silicone | 30-70 | Good temperature resistance, FDA compliant options | Consumer electronics, general purpose controls |
| High-Tear Strength Silicone | 40-60 | Enhanced durability, resistant to tearing | High-use applications, industrial controls |
| Conductive Silicone | 50-70 | Electrical conductivity, EMI shielding | Membrane switches, RF applications |
| Fluorosilicone | 40-70 | Excellent chemical/fuel resistance | Automotive, aerospace, chemical environments |
| Medical Grade Silicone | 30-50 | Biocompatible, sterilizable | Medical devices, laboratory equipment |
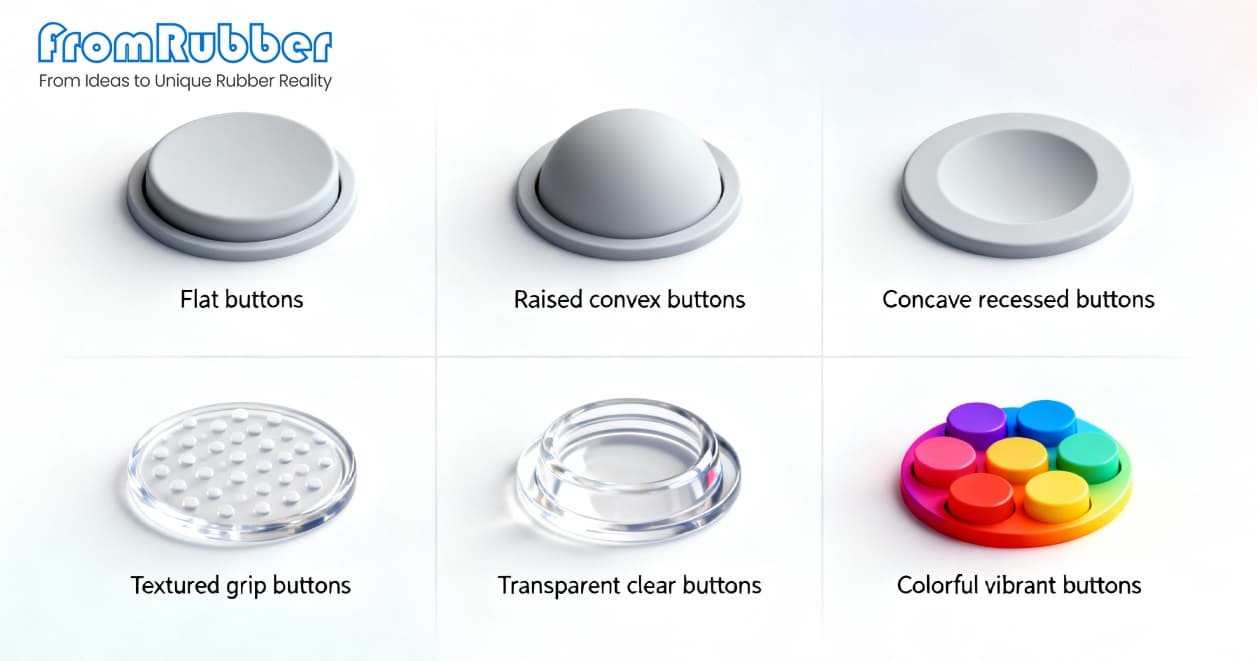
Texture and Surface Finish: What Should You Specify?
Texture is a functional choice disguised as an aesthetic one. A matte finish in the 3 to 8 micrometre range hides handling marks, resists the polished sheen that appears after months of thumb use, and gives a consistent grip with gloves. A high gloss is easier to clean but shows every scuff.
The practical constraint is the tool. Texture is transferred from the mold, so the finish has to be chosen before the steel is cut; changing from matte to gloss later means re-texturing or remaking the cavity. Specify the finish as a Ra range or by a physical sample, not by a word like "soft" that two people will interpret differently.
Legend durability follows the same logic. Screen printing sits on the surface; laser etching cuts into it; double-shot molding puts the legend through the full thickness. For a panel that will be cleaned with solvent, the method matters more than the ink. You can compare constructions on our custom silicone button page.
Conclusion: Designing Exceptional Rubber Buttons
Creating successful custom rubber buttons requires meticulous attention to three interconnected elements: shape, texture, and tactile feedback. By following the comprehensive checklists and guidelines presented in this article, you can design buttons that not only meet functional requirements but also deliver superior user experiences.
Remember that the most effective designs emerge from iterative prototyping and testing. Engage with manufacturing partners early in the process to ensure your designs are both innovative and producible. With careful consideration of each design element and its impact on the final user experience, you can create custom rubber buttons that enhance your product's performance, durability, and market appeal.
Whether you're designing for consumer electronics, medical devices, industrial controls, or specialized applications, the principles outlined in this guide will help you navigate the complexities of rubber button design and achieve optimal results that balance aesthetics, functionality, and manufacturability.
Frequently Asked Questions
Can a custom rubber button be tuned after the mold is made?
Partly. Actuation force can be shifted by adjusting the web or adding a small pad on the dome, and both are usually done by EDM work on the cavity. Travel and skirt angle are much harder to change, because they require removing or adding steel in the wrong direction.
How do I compare two samples fairly?
Test both on a force-displacement rig with the same platen and the same speed, and compare the curves rather than the peak values. Ask for at least ten actuations per key and check the tenth against the first to see whether the feel is drifting.
Does a softer durometer always feel better?
No. A softer compound reduces the force required but also reduces the return force, so keys can feel vague and return slowly. The dome and web geometry usually control perceived feel more than the durometer does.