Silicone Gaskets for Electrical Enclosures: How to Improve Waterproof Sealing Performance
- Share
- publisher
- FromRubber
- Issue Time
- Nov 4,2026
Summary
An electrical cabinet seals across a moving door, so compression is never uniform along the perimeter. This article examines the four geometric reasons perimeter gaskets leak, how profile and contact width interact with latch force, why a moulded corner usually beats a mitred joint, and how to check the contact pattern before another gasket is ordered.
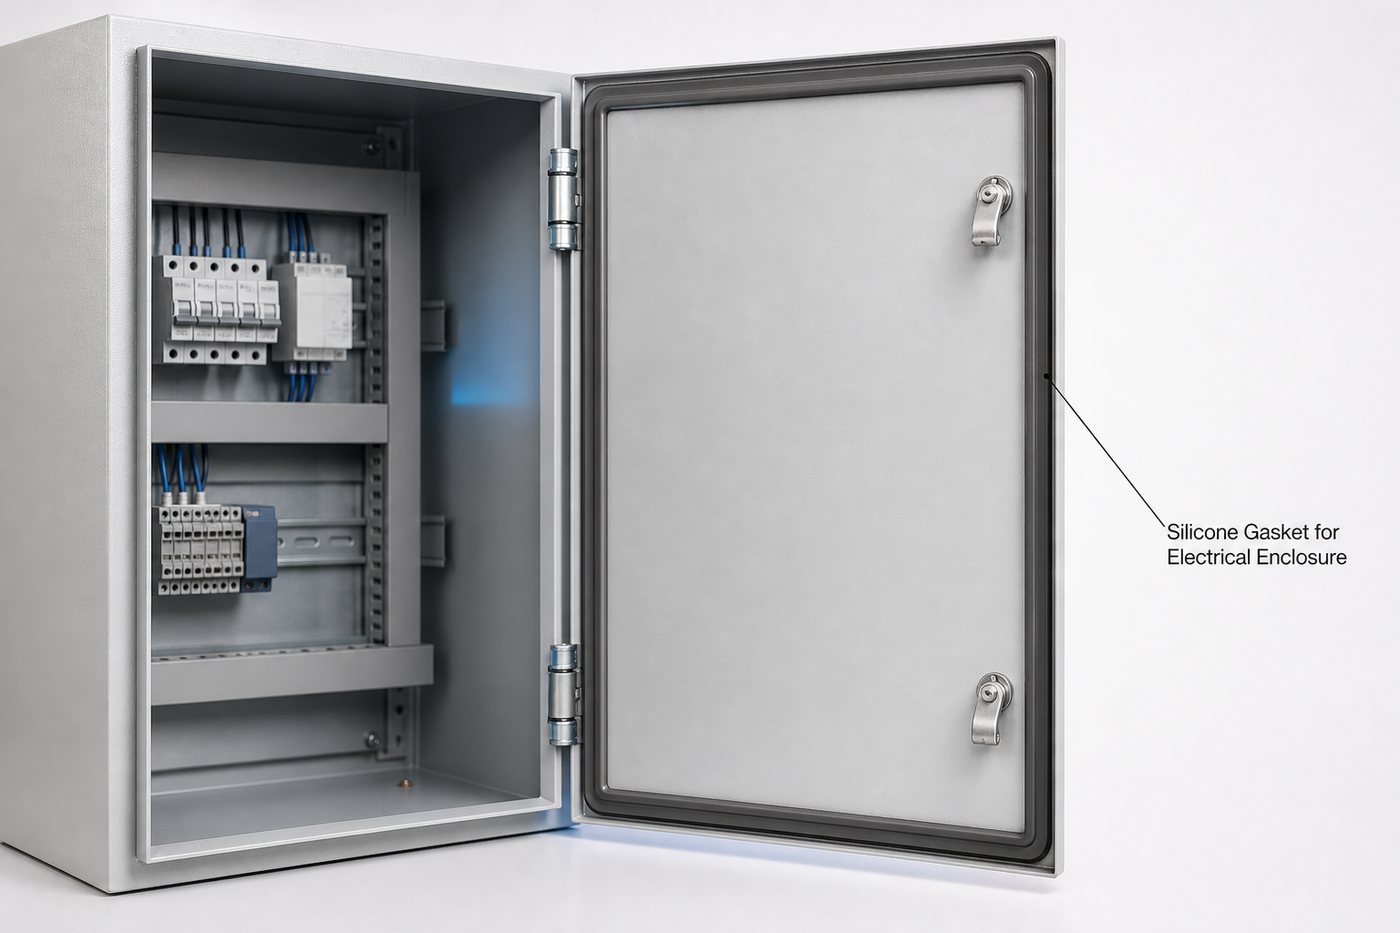
An electrical cabinet is not a box with a lid. It is a box with a door, and a door is a lever. That difference is the reason a cabinet that seals perfectly on the day it is assembled can be letting water into the bottom corner a year later, even though the gasket is still intact and nobody has touched it.
The gasket is usually the first thing replaced when a cabinet fails an ingress test. In most of the cases we see, the gasket was doing exactly what it was asked. The door had stopped asking it to do the same thing all the way around.
A perimeter seal on a swinging door has to work across a moving geometry. The hinge holds one edge at a fixed distance; the latch pulls one point in; the panel between them deflects by however much the steel allows. Add thermal expansion on a one-metre door, add a hinge that has worn a fraction after two hundred openings, and the compression at the far corner from the latch is no longer the value that was designed.
The result is a seal with a compression gradient. It passes a hose test at the factory because the test is run once, on a new cabinet, usually with the door closed by the person who built it. It fails in service because the conditions that made it pass were temporary.
What causes poor sealing in an electrical enclosure
Four mechanisms account for most failures, and they tend to appear in combination rather than alone.
The common thread is that all four are geometric. None of them is solved by changing the compound, and all of them can be diagnosed with a straight edge, a feeler gauge and a look at how the door actually closes.
It is worth saying plainly: if the door does not close flat, no gasket will make the cabinet waterproof. The gasket's job is to absorb the difference between two surfaces that are already close. It cannot create a flat surface out of a twisted one.
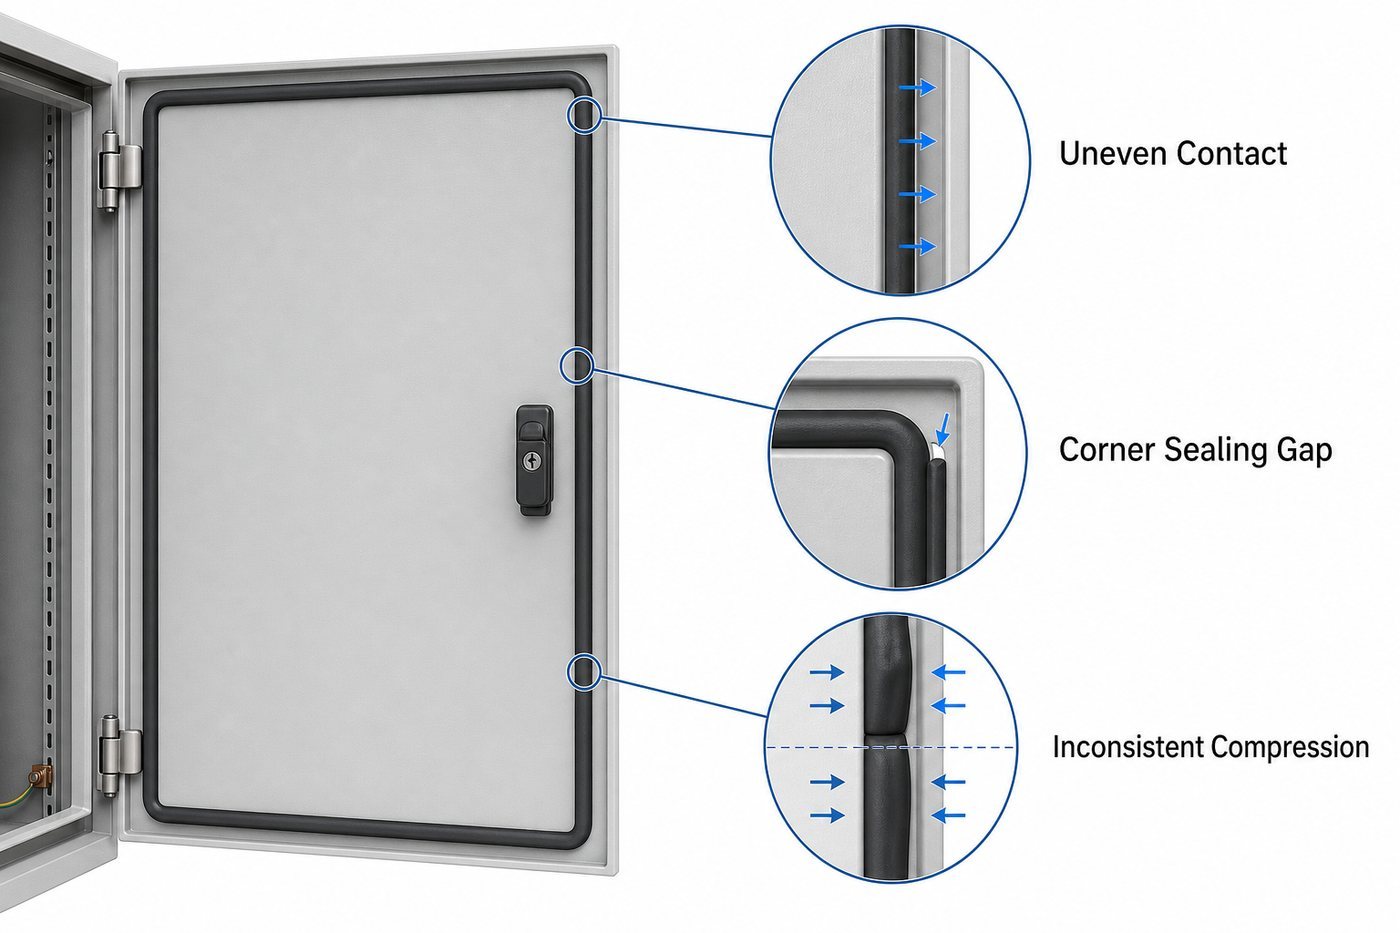
Uneven contact between the door and the frame
Sheet steel doors are not flat. They are folded, welded and painted, and the painting process alone can bow a panel enough to matter. When the door is pulled shut by a latch in the middle of one side, the panel bends around that point, so the gasket is compressed hardest near the latch and least at the opposite corners. A door with a single latch on a metre-wide opening will always have a compression gradient; the question is whether the gradient stays inside the gasket's working range.
Leakage around corners and joint connections
A corner on a cabinet door is where the gasket changes direction, where the frame is welded, and where water naturally collects. Welded corners are rarely as flat as the straight runs, and the gasket has to turn through a radius that may be tighter than the section can follow without wrinkling on the inside of the bend. On a moulded gasket the corner can be designed in; on a cut-and-joined gasket the joint itself is the weak point, and the joint should never sit on a vertical run where water can run down onto it.
Insufficient or excessive compression
Insufficient compression leaves a path. Excessive compression is quieter but just as damaging: the rubber takes a permanent set, the door becomes hard to close, and the hinge and latch carry loads they were not designed for. On a cabinet that is opened weekly for maintenance, an over-compressed gasket will be flat within a year and will then behave like an under-compressed one.
Gasket movement during door installation
A long perimeter gasket is difficult to keep in place while a door is hung, especially if it is a push-on profile or an adhesive-backed strip. If it shifts by a few millimetres at one corner during fitting, the sealing land moves with it, and the leak appears where the gasket no longer overlaps the frame. Adhesive backing helps only if the surface was prepared and the tape was chosen for the substrate; on a painted or powder-coated surface, a general-purpose tape will let go in the first hot week. The selection points are set out in this guide to adhesive backing for silicone gaskets.
| What you see | Geometric cause | What actually fixes it |
|---|---|---|
| Drip at the corner furthest from the latch | Door bows under a single point load | Second latch point, a stiffer door, or a wider contact band rather than a thicker gasket |
| Weep along the hinge side | Hinge drop after repeated opening | Hinge adjustment and a gasket section sized for the worn position |
| Leak appears after a few months | Gasket took a set near the latch | Re-check the compression window; a firmer compound only helps if the door can still close |
| Leak at one corner joint | Mitred or butted joint opened | Moulded corner, or move the joint to a horizontal run away from the latch |
Designing a silicone gasket for a cabinet door
The design questions are the same as for any seal, but the answers are constrained by the door's mechanics.
Selecting the right gasket profile
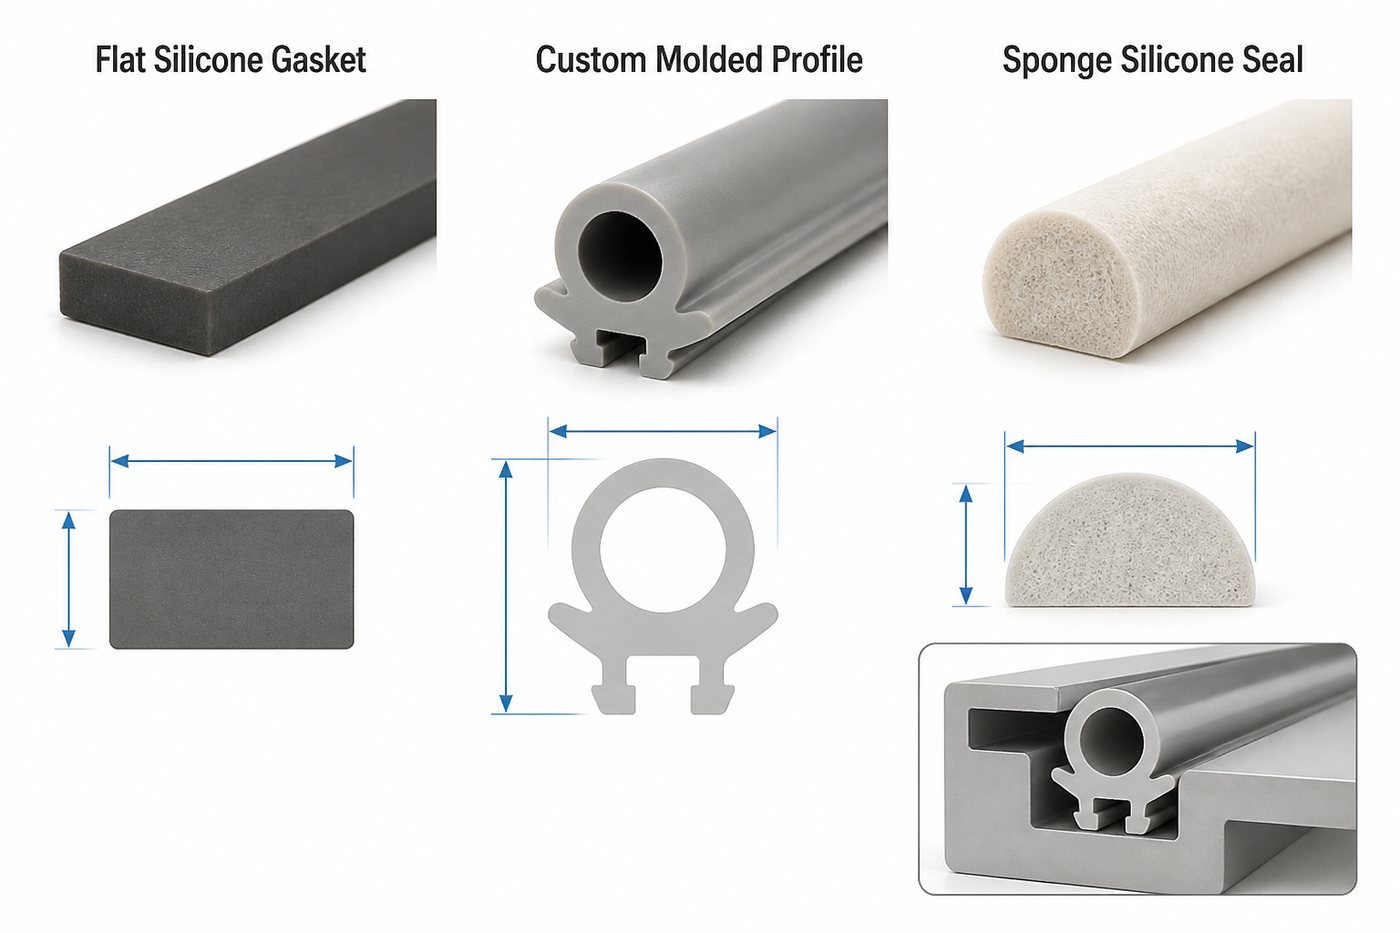
A flat gasket on a cabinet door needs a wide, flat land and enough closing force to compress it across the whole perimeter. A moulded profile with a hollow bulb or a lip generates more compression per unit of closing force, which suits a door held by a cam latch, but it is also easier to roll out of position if the groove is shallow. A push-on U-profile is convenient for sheet metal edges and is common on standard cabinets, but the metal edge it grips has to be deburred and consistent, or the profile sits at different heights around the door.
The three sections below cover most cabinet work, and they fail in different ways. The flat gasket is the most forgiving of a rough frame and the least tolerant of a door that does not close flat. The moulded profile seals at the lowest closing force, which is why it appears on doors with cam latches. The sponge profile closes a large gap without loading the door, and is usually the right answer only when the requirement is dust and splash rather than a pressurised water test.
Comparing them on a drawing is misleading, because the useful difference is how each one behaves when the gap changes by half a millimetre at the corner furthest from the latch.
Determining thickness and contact width
Thickness and contact width work together. A thick, narrow section gives high unit pressure at the contact line but a small tolerance band. A thinner, wider section spreads the load and tolerates door deflection, but needs a flatter frame. For a large door with a single latch, the wider contact band is usually the more honest choice, because it survives the deflection that the door will develop anyway.
Designing corners and continuous sections
The corner radius on the door and the corner geometry of the gasket have to match. If the gasket is moulded with a corner, the moulded radius should follow the frame radius rather than the door radius, because the gasket seals against the frame. If the gasket is a joined strip, the joint should be on a horizontal run, mitred rather than butted, and positioned away from the latch and the hinge.
Material selection for outdoor and industrial cabinets
Cabinet gaskets live outdoors more often than electronic device gaskets do, and the environmental load is different: sunlight, ozone, temperature swings on a large painted surface, and rain driven sideways.
Hardness and mechanical requirements
Hardness has to match both the latch force and the door stiffness. A rigid steel door can compress a firmer compound and benefits from the stability. A thin or plastic door needs a softer section, otherwise the door bows around the latch and the gasket ends up compressed in one place and untouched in another. On a cabinet, hardness and door stiffness should be chosen as a pair.
Temperature and outdoor exposure
Silicone resists UV and ozone well, which is why it is common on outdoor cabinets, but UV resistance is not the same as thermal stability. A dark painted cabinet in direct sun can reach a surface temperature well above the ambient air temperature, and the gasket at the top edge sits at that temperature for hours. That is the condition to specify against, and it is worth measuring rather than estimating.
Solid or sponge for enclosure sealing
Solid silicone is the default for a compression seal on a door that has to hold an ingress rating. Sponge is useful where the gap varies and the closing force is low, but it has two weaknesses on a cabinet: it takes set under long compression, and once the skin is damaged it can hold water against the frame. A sponge seal on a cabinet that is opened regularly will flatten at the latch first.
Improving sealing consistency across the perimeter
Define the compression range before finalising the design
Write down the minimum compression that closes the surface and the maximum the latch and hinge can tolerate, then check the door geometry against that window at the latch, at mid-span, and at the corner furthest from the latch. If the window cannot be met at all three points, the gasket is not the part that needs changing.
Check the whole perimeter, not one section
A section check at the latch tells you almost nothing. The useful check is a contact pattern around the full perimeter: closed-cell foam strips, pressure film, or a soft wire pulled out at intervals. On a large door, the pattern usually shows a band of good contact near the latch, a thinning band along the hinge side, and a gap at the corner diagonally opposite the latch.
Verify the gasket on the assembled cabinet
An ingress test on the finished cabinet is the only test that reflects the real joint. A dimensional report on the gasket cannot tell you whether the door closes flat, and a hose test on a cabinet with the door held shut by hand is not a test of the latch. If the product claims a specific IP rating, the test has to follow the method defined for that rating, with the cabinet closed as it will be in service.
What a cabinet gasket drawing should contain
- Overall perimeter dimensions measured on the frame, not only on the door.
- Cross-sectional profile with the sealing contact face identified.
- Thickness and contact width, with tolerances on the sealing dimensions.
- Corner radius and joint position, if the gasket is not moulded in one piece.
- Material hardness and the compound family.
- Operating temperature range, including surface temperature in sun.
- The ingress protection level the cabinet must demonstrate, and the test method.
- How the gasket is retained: groove, adhesive, push-on profile or locating pins.
From prototype to production
On a large perimeter gasket, the prototype is where the corner and the joint get decided. A moulded corner costs more in tooling than a mitred joint, but it removes a hand operation and a variable, and on a cabinet that has to hold an ingress rating the joint is usually the first thing to fail in the field.
Production then has to control the dimensions that affect sealing: section height, corner geometry and the flatness of the part when it is laid on the door. A perimeter gasket that is dimensionally correct but twisted will pull itself out of the groove as the door is closed, and that behaviour only appears in assembly, not on a measuring table.
Reviewing the drawing and the door
The review should cover the latch layout, the hinge position, the frame flatness and the way the door is hung. A gasket designed from a drawing alone can be perfect and still fail, because the drawing does not show that the door drops two millimetres when it is opened.
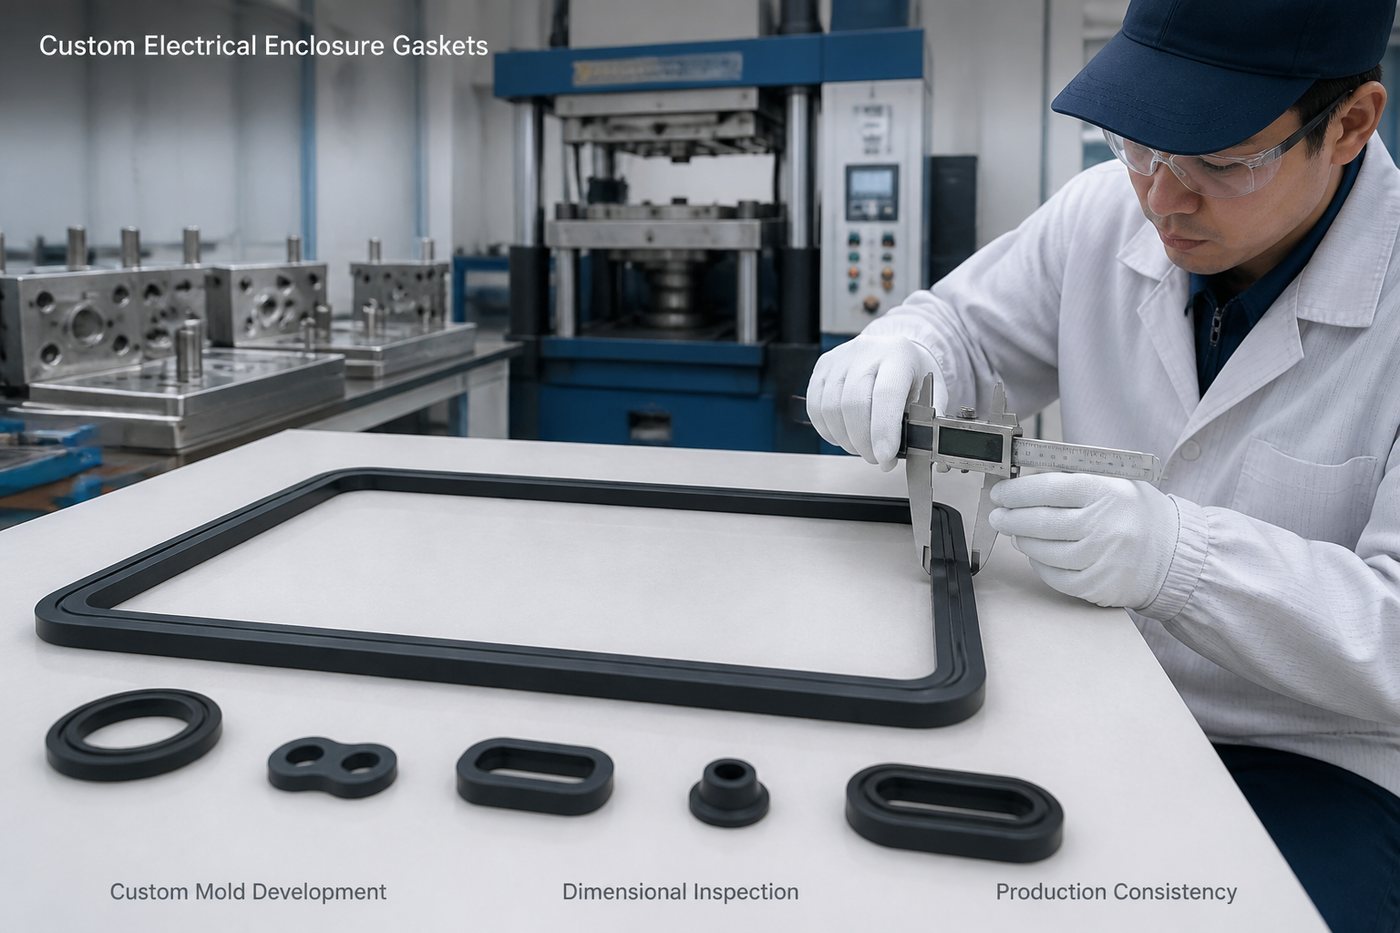
Mould development and sample inspection
Sample inspection should include an assembly trial on the cabinet, with the contact pattern checked around the full perimeter. A sample that measures correctly but sits at a different height at one corner is not a good sample.
Consistency in volume production
Section height, corner geometry and freedom from flash on the sealing face are the three things to inspect. Flash on the contact face is a leak path that no amount of compression will close, and it is the defect most likely to be missed by a dimensional check that only measures the outside of the part.
Custom cabinet gaskets at FromRubber
FromRubber moulds custom silicone gaskets for electrical and industrial enclosures from customer drawings and samples, including large perimeter seals, profiled door gaskets and small moulded components for cable entries and inspection windows. Tooling is built in-house in a CNC shop with 7 machines, and production runs on 32 compression moulding machines, 30 vacuum hydraulic presses and 2 flat-bed presses, across two plants, with inspection at the press and before packing. Quotations are typically issued within 3 working hours of a complete drawing and sample, which is useful when a cabinet is already in an ingress test and the schedule is the constraint. Cabinet and door gaskets sit within the custom silicone seals range.
If a cabinet is failing an ingress test at one corner, the useful information is the contact pattern around the perimeter and the latch layout, not another compound trial. Drawings, door samples and test requirements can be sent through the inquiry page, or discussed on WhatsApp and WeChat at +86 18676210913.
Questions from cabinet manufacturers
Can a gasket fix a door that does not close flat?
No. A gasket absorbs the difference between two surfaces that are already close. If the door is twisted or the frame is out of flatness, a thicker or softer gasket only changes where the gap appears.
Is a moulded gasket better than a mitred strip for a cabinet?
For a cabinet that must hold an ingress rating and is opened regularly, usually yes. A moulded corner removes a hand operation and a joint, and the joint is where most perimeter leaks start. For a low-volume or non-critical panel, a mitred strip can be perfectly adequate.
How do I stop the gasket pulling out when the door is closed?
Give it a groove, a locating bead or a mechanical retention rather than relying on friction. If adhesive is used, the tape has to match the coating on the door, and the surface has to be prepared; a general-purpose tape on a powder-coated frame usually releases in the first hot spell.
Does a higher IP rating require a different gasket material?
Not necessarily. The rating describes the test the enclosure passes, not the material. What changes with a higher rating is usually the compression consistency, the corner geometry and the sealing of cable entries, which are structural rather than chemical questions.
Waterproofing a cabinet is decided at the hinge and the latch before it is decided at the gasket. If the door loads the seal evenly and the gasket stays where it was put, a standard silicone section will do the job. If it does not, a more expensive compound will simply fail in a different place.
Before the next sample round, measure the contact pattern around the full perimeter. It usually explains the leak in one pass.