Silicone Keypads for Industrial Ultrasonic Thickness Gauges: How to Design Glove-Friendly Button Layouts?
- Share
- publisher
- FromRubber
- Issue Time
- Nov 13,2026
Summary
A glove changes the finger, not the key. This article explains how contact area, key height, spacing and surface profile decide whether a gauge panel can be operated without looking, and why couplant gel makes texture a poor identification feature.
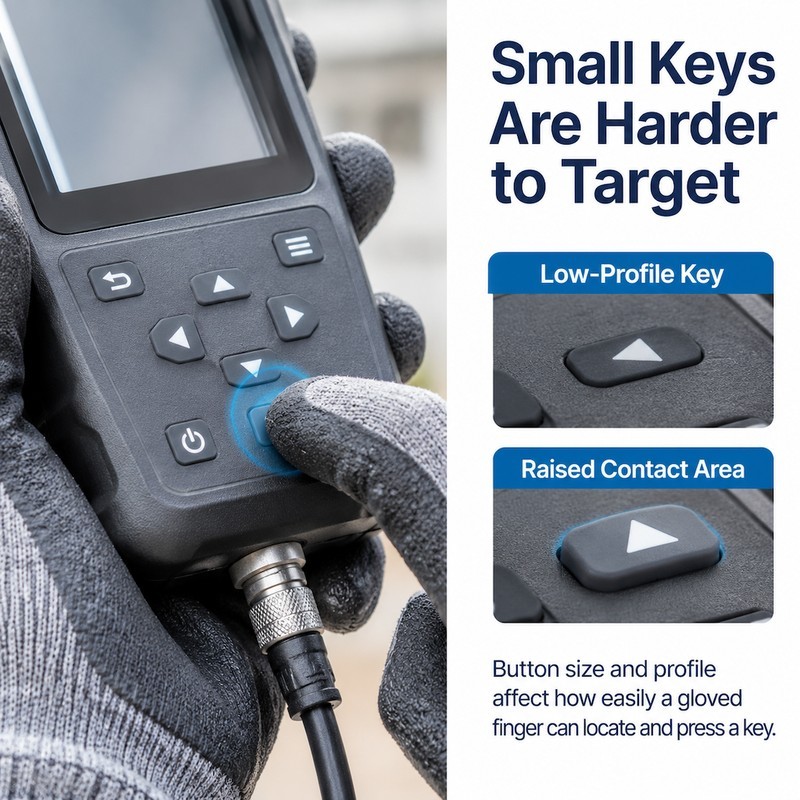
The inspector is holding a thickness gauge against a pipe with one hand, the probe in the other, and a glove on both. The reading is on the screen but the control he needs is the small key under his thumb, and his thumb is inside two layers of nitrile with couplant gel on it. He presses. Nothing changes. He presses again, harder, and this time he also catches the key next to it and opens a menu he then has to close.
This is the ordinary failure of an instrument panel designed for a bare fingertip and then used by a gloved hand. It is not a failure of electronics or of a display. It is a silicone keypad for industrial ultrasonic thickness gauges that was specified as a set of symbols on a flat surface, when what the operator actually needs is a set of raised targets that can be found and confirmed by touch, under load, with a slippery hand. Silicone keypads for gloves are a different design problem from silicone keypads for bare fingertips, and the difference is decided by geometry rather than by material.
Why Is Glove-Friendly Button Design Important for Ultrasonic Thickness Gauges?
A glove does three things at once. It increases the contact area, spreads the applied force over a patch larger than the key, and removes much of the fine sensation that tells a fingertip where a key edge is. The key has not changed, but the finger has. Every design decision that assumed a bare fingertip now has to be re-examined.
Small Buttons Can Be Difficult to Operate With Protective Gloves
Below a certain size, a key stops being a target and becomes a location. The gloved thumb knows roughly where the key is, presses, and cannot tell whether the press landed on the key or on the land beside it until the screen changes. On an instrument where a wrong press opens a menu, the operator loses the reading and has to start again.
The usual response, making the key taller, helps only if the keytop is also wide enough for the glove to sit on. A tall narrow key concentrates the press on the glove's surface and can feel like a pin through leather. Height and area have to grow together.
Couplant gel makes this worse in a way that is easy to overlook. The gel is designed to stay wet on a steel surface, and it does the same on a keytop. A textured surface full of fine grooves holds the gel and becomes slick, so the feature that was meant to improve grip reduces it. On gauges, shape and height carry the identification, and texture is used sparingly.
The practical test is quick: put on the gloves the inspectors actually wear, wet the thumb with couplant, and try to change the measurement mode without looking. If the operator has to look, the panel is not glove-friendly regardless of what the drawing says about key height.
Crowded Button Layouts Can Increase Input Errors
Inspection instruments carry a lot of functions for their size: measurement mode, velocity, probe zero, units, backlight, store, recall, delete. When they are arranged as an even grid, every key looks equally likely, and a gloved finger working by position is one key away from a destructive action such as deleting a reading.
Separation protects the functions that cannot be undone. Delete and calibration keys deserve clearance that measurement keys do not need, because the cost of a mis-press is asymmetric. Spacing spent on the dangerous keys buys more than spacing spread evenly across the panel.
Low-Profile Keys May Be Difficult to Identify by Touch
A flat key gives the finger nothing to read except its position relative to other flat keys. Add a glove and the reading becomes nearly impossible. Raised keys work because the finger detects the change in level before it detects the press, and that change is detectable through leather where a printed symbol is not.
Differentiated profiles extend the idea. A raised ring around one key, a bar across another, a concave dish on the most-used key: each gives a distinct edge that can be recognised with a thumb in motion.
Which Button Design Features Make Silicone Keypads Easier to Use With Gloves?
| Design decision | What it changes for a gloved hand | What to check on the sample |
|---|---|---|
| Larger keytop area | More of the glove can sit on the key without touching the neighbour | Press with the pad of the thumb, not the tip |
| Raised key with a defined wall | The finger meets an edge before the keytop | Find the key without looking, with the device held as in use |
| Clear land between controls | A resting place for the thumb between targets | Slide the thumb across the panel and count false presses |
| Shaped or dished keytop | Centres the thumb and resists slipping on gel | Wet the glove with couplant and repeat |
| Firmer dome under the key | Press is confirmed through the glove | Hold for three seconds; check the thumb does not drift |
Increase Button Contact Area Without Oversizing the Keypad
Contact area and keypad size are not the same constraint. A round key of a given diameter has a usable top area that is smaller than its footprint suggests, because the edge radius falls away. An elongated or rounded-rectangular key can add usable area in one direction without adding to the other, which is exactly what a narrow handheld panel needs.
Shape also carries meaning. A wide key at the top of a cluster reads as the primary measurement key; narrow keys below read as adjustments. The operator learns the layout from the shapes rather than from the legends, which is the only kind of learning that survives gloves.
Use Raised Button Profiles for Better Tactile Recognition
Three profiles are usually enough: a tall primary key, medium secondary keys, and a low, deliberately resistant key for functions that should not be pressed by accident. The differences should be visible in a section drawing, not left to the moulding to express. If the difference cannot be measured with a height gauge, it will not be reliable in production.
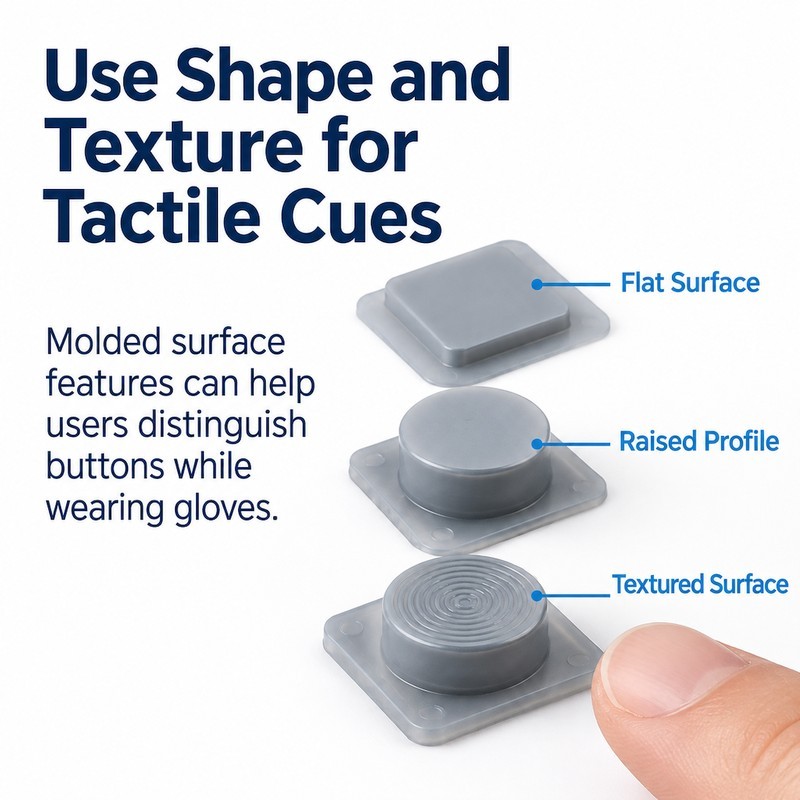
Raised profiles also need a stable base. A key that stands 2 mm above the land but rocks when pressed off-centre feels worse than a lower key that moves cleanly, because the rocking is ambiguous: the finger cannot tell whether the press registered or the key tilted.
Support comes from the wall geometry and from the land around the key. Both are set in the cavity, which is why profile decisions belong in the tool review rather than in the finishing stage.
Provide Enough Space Between Frequently Used Buttons
Spacing should follow frequency. The two or three keys pressed during every measurement need clearance for a gloved thumb; the configuration keys can sit closer together because they are pressed deliberately, usually with the instrument held still. Uniform spacing treats a rarely used key as if it were as urgent as the measurement key, and it spends panel area where nothing is gained.
How Should Silicone Keypad Layouts Be Designed for Industrial Inspection Equipment?
Arrange Measurement Controls Around Their Operating Functions
Group by what the operator is doing, not by what the electronics do. Measurement, storage and navigation are three different activities, and each has a natural hand position. When mode selection is placed next to the store key because both are "settings", the operator has to think about the panel instead of the pipe in front of him.
Consider One-Handed Operation and Device Grip
Most readings are taken with one hand holding the instrument against the workpiece and the other holding the probe. The keypad is therefore operated by the thumb of the holding hand, often while the wrist is rotated to keep the probe cable clear. Thumb reach in that position is not the same as thumb reach on a bench.
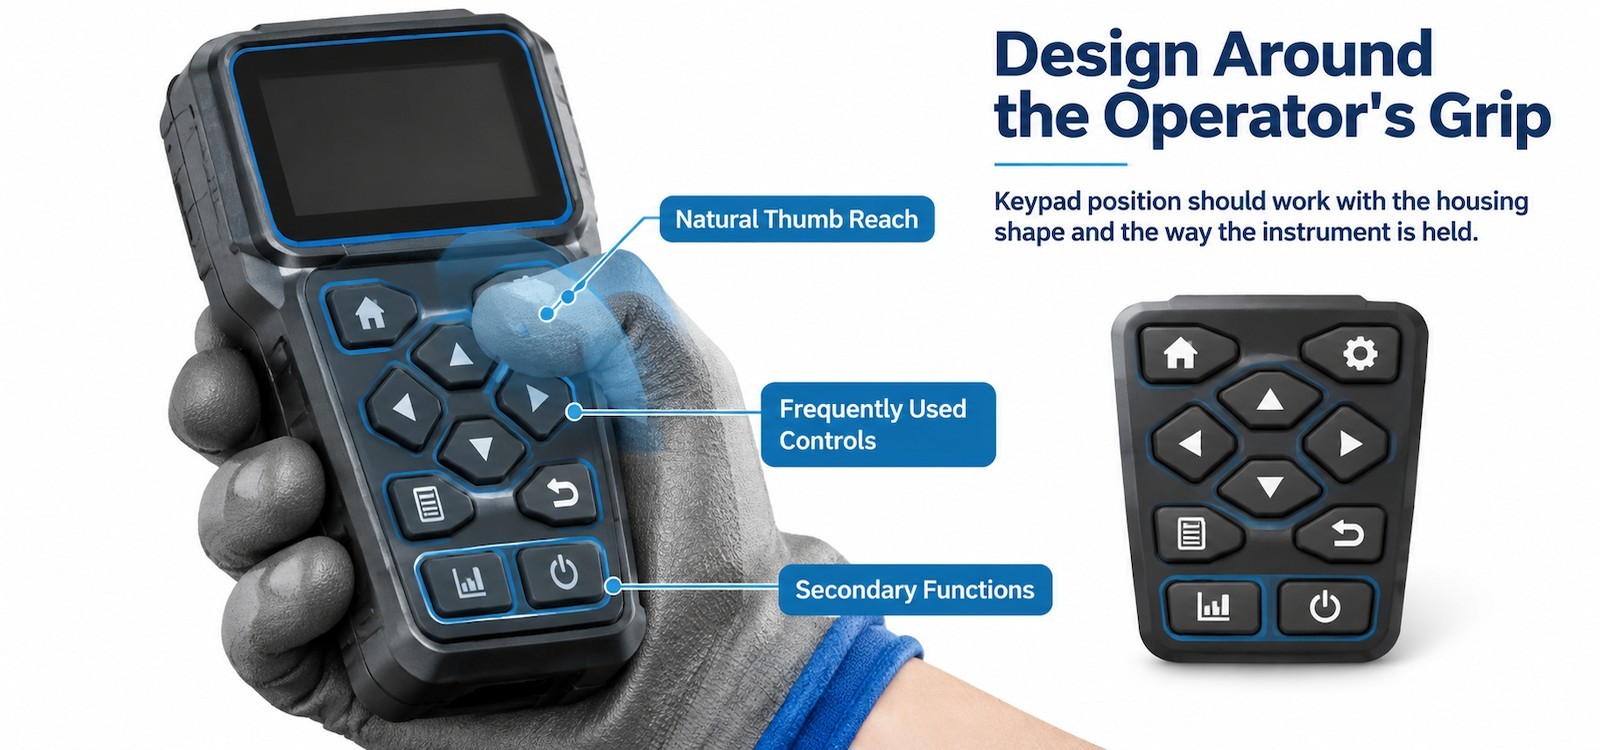
Mock this up before the cavity is cut. A 3D print with the real keypad footprint, held in the real glove against a real pipe, will show within a minute whether the delete key sits under the thumb's resting position. That is the kind of finding that is cheap now and expensive after tooling.
Balance Button Height With Housing Protection
Raised keys are easier to press, and easier to press by accident when the instrument is set down or pushed into a pocket. The usual compromise is a recessed bezel around the keypad area, so the keys stand above the panel but not above the surrounding housing. That gives the finger an edge to find and the housing something to protect.
A higher key is not automatically better. Beyond a certain height, the key becomes a lever, and an off-centre press on a tall narrow key loads the wall instead of the dome. The limit is set by the wall thickness and by the dome underneath, which is why height decisions have to be made with the section in view.
How Do Silicone Material and Membrane Structure Affect Glove-Friendly Operation?
Select Silicone Hardness for Comfortable Pressing
Hardness on the Shore A scale, as defined in ASTM D2240, sets the material's resistance to indentation. For glove use, a slightly softer compound widens the effective contact patch and lowers breakaway force, which helps the operator confirm the press. Too soft, and the key loses the return energy needed to come back quickly under a heavy thumb.
The useful approach is to choose hardness after the geometry, using two prototypes of the same shape in two compounds and testing them in gloves. Comparing two shapes in one compound will tell you about shape, not about material.
Adjust Membrane Thickness for Better Button Response
Membrane thickness controls the spring rate of the sheet around each key. Thinner sections press more easily but return more slowly; thicker ones return fast and resist more. On an instrument panel with a mix of key sizes, keeping the wall thickness uniform across the panel is what makes the keys feel like one product rather than a collection.
Use Surface Textures to Improve Button Identification
Texture is most useful when it is coarse. Fine grooves fill with couplant and dust; a broad moulded rib, a pronounced dish or a raised ring survives contamination and is still detectable through a glove. If the texture is meant to identify a key rather than to provide grip, it should be a shape rather than a finish.
What Manufacturing Challenges Should Be Considered During Custom Silicone Keypad Production?
Maintaining Consistent Button Height and Spacing
Height is the feature the operator relies on, so it is the one that has to be inspected. Cavity depth, clamp force and material lot all move it. A first-article report that records height on every key, not just the tallest, is the difference between a panel that feels consistent and one that develops a "soft corner" three months into production.
Preventing Flash Around Closely Spaced Buttons
On a panel where the clear gap is small, flash does not just look untidy; it removes the gap. Where the parting line is placed matters: on a land, flash can be trimmed; on a key wall, trimming risks damaging the key edge. Review the parting line together with the layout, not afterwards.
Ensuring Proper Alignment With the Device Housing
Locating features keep the keypad where the drawing puts it. Without them, assembly tolerance is absorbed by the keys, and the keys at one edge end up with less travel than the keys at the other. That difference is felt as an inconsistent panel and is very hard to diagnose from a bare sample.
How Should Industrial Device Manufacturers Validate a Glove-Friendly Keypad Design?
Test Button Accessibility With Representative Gloves
Use the gloves from the site. Nitrile examination gloves, leather rigging gloves and coated knit gloves transmit force in completely different ways, and a panel tuned for the first will fail with the third. Test in the posture used in the field, with the instrument held against a surface.
Check Pressing Force and Rebound
Measure breakaway force and return on every key, then press each key in a sequence the way an operator would: mode, zero, measure, store. The failures that matter are the ones that appear in sequence, when the thumb moves from one key to the next without lifting clear.
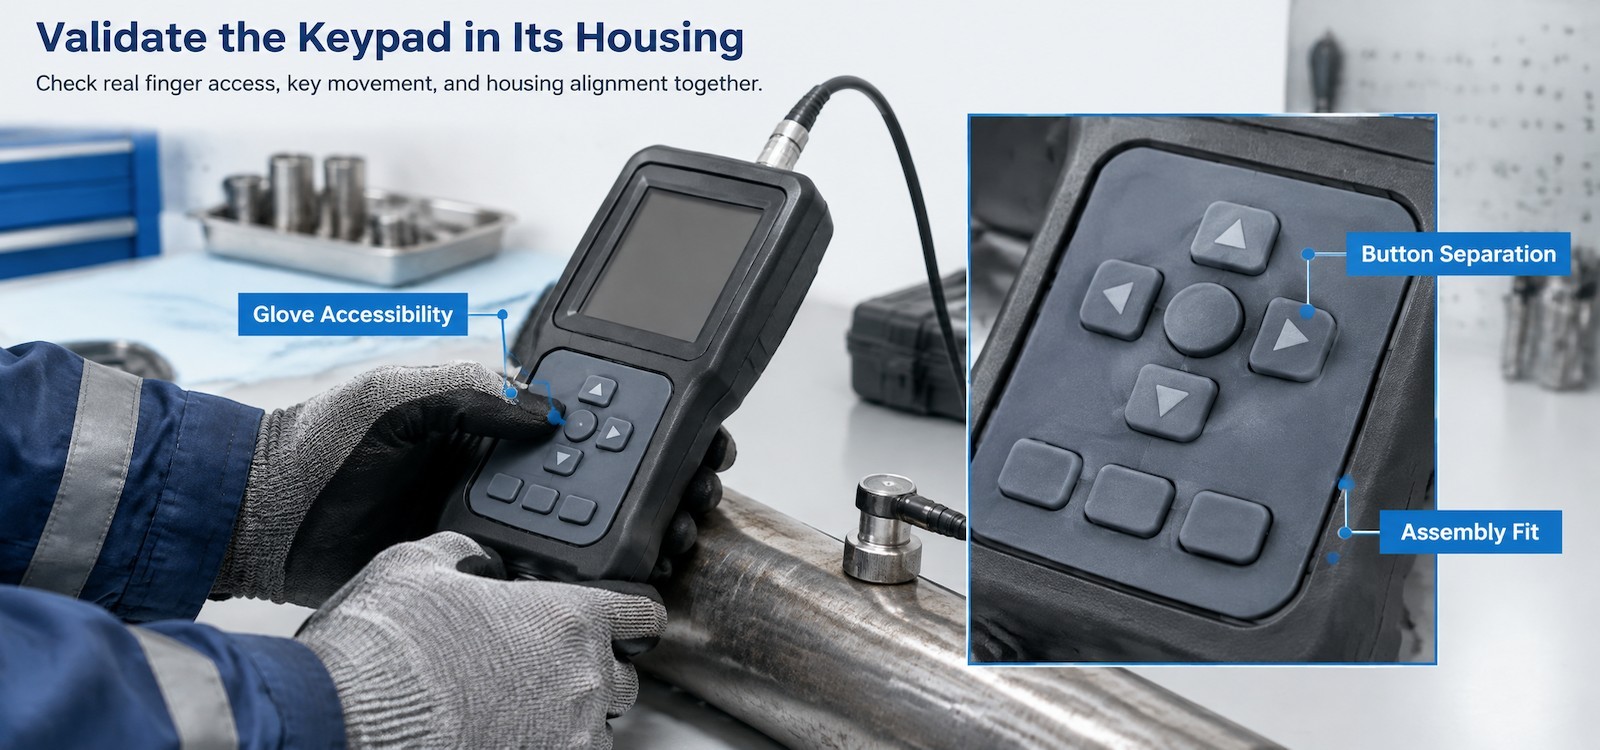
Review the Complete Housing and Keypad Assembly
Approve the sample in the housing, with the PCB fitted and the bezel in place. Check that each key is proud of the bezel by the intended amount, that the keypad cannot shift sideways, and that the contact pills sit on their pads when the housing is fully assembled. Then repeat the glove test.
Frequently Asked Questions About Silicone Keypads for Gloves
How large should silicone keypad buttons be for glove operation?
Large enough that the pad of a gloved thumb can sit on the keytop without overlapping the neighbouring key. In practice this is set by the glove type and the spacing rather than by a single diameter, which is why testing with the real gloves settles the question faster than a table.
Can raised silicone buttons improve operation with protective gloves?
Yes. A raised key gives the finger an edge to find before it reaches the keytop, and that edge survives a glove and a layer of couplant. The benefit depends on the key also being wide enough and on the wall being stable under an off-centre press.
Does increasing button spacing always improve keypad usability?
No. Spacing spent between rarely used configuration keys gains little and can push important keys out of the thumb's reach on a handheld instrument. Spacing is most valuable around the keys that are pressed during every measurement and around any key that cannot be undone.
Which silicone hardness is suitable for industrial instrument keypads?
There is no single answer, because the press force comes from geometry as much as from compound. Softer compounds help gloved confirmation; firmer ones return faster. Prototyping the same geometry in two hardnesses, tested in the field gloves, is the reliable way to choose.
Can custom silicone keypads be designed for compact handheld measuring devices?
Yes, by using shaped keys that add usable area in one direction, by grouping secondary functions away from the measurement keys, and by keeping the primary controls inside the thumb's natural reach. Our notes on keypads for handheld measuring instruments cover the sticking problems that appear when those panels are made too tight.
What Glove-Friendly Really Costs
Glove-friendly design is not a material upgrade. Silicone keypads for gloves are won on geometry: keytop area, key height, profile families, spacing around the keys that matter, parting line placement and locating features. None of them adds cost per part; all of them are expensive to add after the cavity exists.
FromRubber is operated by Dongguan Bohao Electronic Technology Co., Ltd. in Dongguan, Guangdong. FromRubber moulds custom keypads and industrial silicone parts across two plants in Dongguan, with more than 12,000 square metres of production space, 220 staff and tooling kept in house. If you have a gauge panel that works on the bench and fails in a glove, send the housing section and the key layout and we will show you where the reach and the target size disagree. Phone, WhatsApp or WeChat: +86 18676210913, or use the contact page.
Related Reading
Sources and Test Methods Referenced
- ASTM D2240-15(2021), Standard Test Method for Rubber Property, Durometer Hardness. ASTM International.
- ISO 23529:2016, Rubber, general procedures for preparing and conditioning test pieces for physical test methods. ISO.
- ISO 2768-1:1989, General tolerances, Part 1: Tolerances for linear and angular dimensions without individual tolerance indications. ISO.
- IEC 60529:1989+AMD1:1999+AMD2:2013, Degrees of protection provided by enclosures (IP Code). IEC.
- ASTM D395-18(2025), Standard Test Methods for Rubber Property, Compression Set. ASTM International.
- Editions checked against the ASTM, ISO and IEC publisher listings in November 2026.