The Role of Conductive Keypads In Industrial Applications
- Share
- publisher
- karl
- Issue Time
- Jun 23,2025
Summary
A conductive keypad is a silicone keypad whose carbon-loaded pills short PCB pads when pressed. This guide covers contact resistance, pill geometry, sealing, ESD and the drawing data an industrial OEM should specify before tooling.
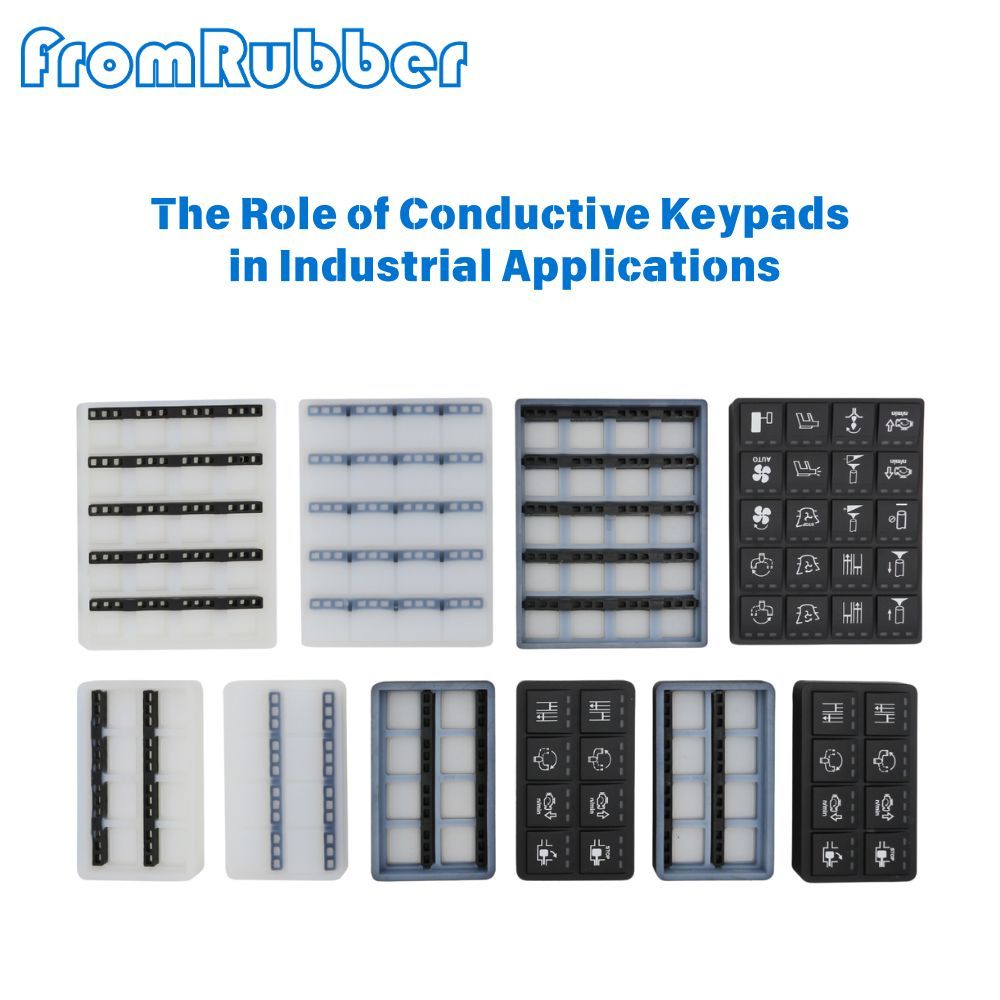
A conductive keypad is a silicone keypad whose pressing surface carries a carbon-loaded pill that bridges a pair of PCB pads when the key moves down. Industrial equipment does not use it because it feels soft. It uses it because the switch itself can be sealed, backlit, cleaned with a solvent wipe and built without a single metal contact that corrodes.
That distinction matters when a keypad is specified. A consumer keypad is judged on feel and cost per unit. An industrial keypad is judged on contact resistance after 500,000 presses, on whether dust can creep under a key, and on whether the same part still works after a coolant spill. This article covers the electrical job the pill performs, the failure modes that actually appear in the field, and the drawing data that decides which of the two outcomes you get.
What a Conductive Keypad Does in an Industrial Control Panel
Mechanically the part is simple: a moulded silicone mat, a raised key body per function, a carbon pill on the underside of each key, and a PCB underneath with interdigitated tracks. Press the key and the pill shorts the tracks. Release it and the silicone web pushes the key back.
Electrically it is a resistive switch, not a metal-to-metal contact. The pill is silicone filled with carbon black, so the closed resistance is set by the filler loading, the contact area and the force holding the two surfaces together. Typical production parts close in the range of tens of ohms to a few hundred ohms, and the number that matters is not the lowest reading you see on a bench but the highest reading you see on a cold, dry, lightly pressed key at end of life.
That is why the same keypad can be perfectly reliable on a benchtop console and intermittent on a machine tool. The difference is rarely the moulding. It is the force the operator actually applies, the flatness of the PCB under the pill, and whether contamination has built a film on the carbon surface.

How a Conductive Keypad Closes the Circuit
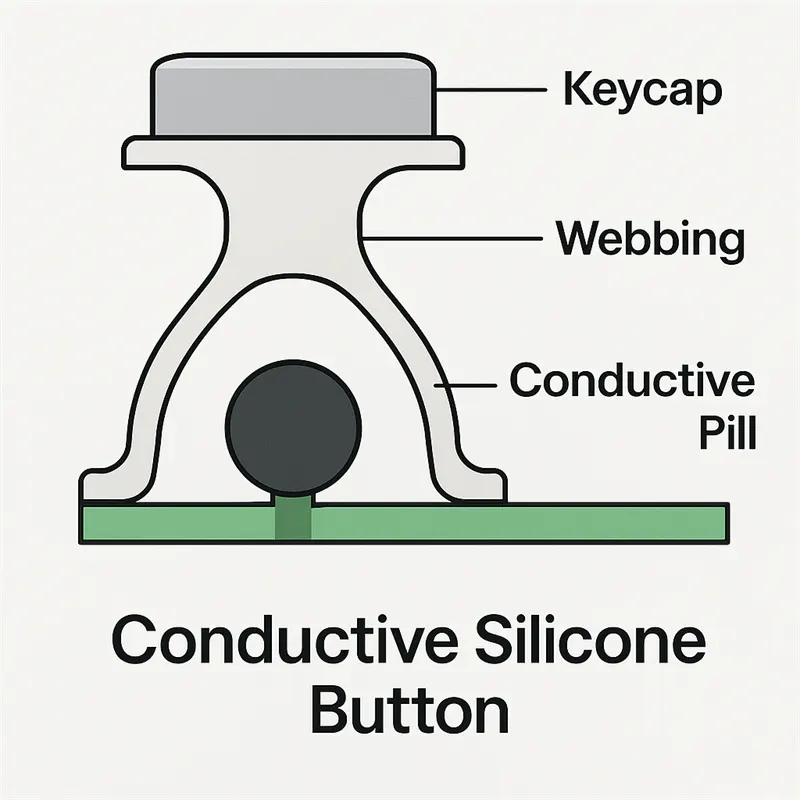
Three dimensions decide the electrical result before any material is chosen. The pill diameter sets contact area. The pill height above the PCB at rest sets how far the key must travel before it makes contact, and therefore how much force is available at the moment of closure. The web thickness under the keycap sets the snap and the return force.
Increase pill area and resistance falls, but the key becomes harder to release cleanly on a warped PCB because a larger flat surface bridges dust more easily at the edges. Reduce travel and the key feels sharper, but there is less overtravel to absorb stack tolerances between the mat, the spacer and the board.
| Design variable | Typical starting point | What it controls |
|---|---|---|
| Pill diameter | 2.0 – 3.5 mm per contact | Contact area and closed resistance |
| Pill protrusion below skirt | 0.1 – 0.3 mm | Point of contact and pre-travel |
| Actuation force | 150 – 400 gf | Operator feedback and contact pressure |
| Key travel | 0.8 – 2.0 mm | Overtravel margin against stack tolerance |
| Web thickness | 0.25 – 0.45 mm | Snap ratio and return force |
| Carbon loading | Set by the compound, not the drawing | Resistance band and wear rate |
Where a Conductive Keypad Usually Fails in Service
- Rising closed resistance. Silicone plasticiser migrates to the carbon surface, or airborne oil deposits on it, and the contact behaves like a resistor in series. The key still works, so nobody reports it until the scan circuit stops recognising the press.
- Dead keys at the panel edge. The mat is clamped at its perimeter, so the outer keys have less mechanical preload and the PCB bows away from the pill. Edge keys are almost always the first to fail a life test.
- Ghost presses on sealed panels. A gasket that compresses unevenly holds the mat slightly pre-loaded, and a key that never fully releases looks like a stuck input to the firmware.
- Carbon wear on the tracks. A rough pill face grinds the PCB finish over millions of cycles. The pill is cheaper to replace than the board, so pill surface finish is a real specification item, not a cosmetic one.
Field note: If a conductive keypad passes on the bench but fails at the machine, test it with the panel assembled and the gasket compressed. A loose mat on a flat plate is not the same electrical component as a clamped mat over a board with a connector on the reverse side.
Conductive Keypad Sealing, ESD and Backlight Integration
Sealing is a geometry problem rather than a material problem. A moulded perimeter lip that compresses against the housing gives an IP-rated interface without a separate gasket, but it only works if the lip has a defined compression range and the housing has a hard stop. Relying on the screws to set compression produces panels that leak at one corner and over-compress at the other.
ESD matters wherever an operator can touch a machine that is also a mains-powered device. The carbon pill is a resistive path, which helps, but the design decision is where the discharge goes: through a dedicated ground pad on the mat, through the housing, or through the electronics. Agreeing that path with the electronics engineer at drawing stage is far cheaper than adding a conductive coating after tooling.
Backlighting changes the material, not just the legend. A translucent silicone body with an opaque top coat lets light through the legend only; a white body with laser-etched graphics is cheaper but bleeds light at the key edges. The trade-off is covered in detail in our guide to avoiding light leakage in backlit silicone keypads.

Specifying a Conductive Keypad for Your Machine

Most industrial keypad projects that run late do so because the RFQ contained a layout and a colour but no electrical target. The supplier then quotes the standard construction, which may be right for a domestic appliance and wrong for a machine that is wiped down twice a shift.
A complete enquiry states the environment, the number of presses expected over the product life, the closed resistance window the scan circuit can tolerate, the panel sealing requirement, and whether the legend must be backlit. From those five inputs the construction, the compound, the pill geometry and the test plan follow. Our guide to the custom silicone product process shows how that enquiry turns into tooling and first articles.
What to Put in the Conductive Keypad Drawing
- Closed resistance limit and the test force at which it is measured.
- Actuation force and travel per key, with the tolerance band rather than a nominal value.
- Pill diameter, protrusion and surface finish, called out per key if the layout mixes sizes.
- Perimeter sealing lip compression range and the mating housing surface.
- Legend process, colour reference and whether the key must be backlit.
- Life test count, panel condition during the test, and the acceptance criteria at end of test.
Can a conductive keypad replace a membrane switch?
Yes, where the requirement is a sealed panel with no sharp edges, or where a membrane switch would be damaged by repeated cleaning. A membrane switch is thinner and cheaper in low volumes; a conductive keypad survives solvent wiping, higher actuation forces and repeated flexing, and it can carry backlit legends in the same part.
How many presses should a conductive keypad be rated for?
Industrial panels commonly specify between 500,000 and 2 million presses per key, but the number is meaningless without the force, temperature and contamination conditions of the test. Ask for the test conditions in writing, not just the cycle count.
The short version: a conductive keypad is an electrical component that happens to be moulded in silicone. Specify the resistance window, the force, the travel and the sealing compression, test it in the assembled panel, and the part will behave the same on the machine as it did on the bench. Send us your layout and the five inputs above and we will come back with a construction that meets them, not a catalogue part that nearly does.