What Happens When Silicone Colander Drain Holes Are Too Small or Too Closely Spaced?
- Share
- publisher
- FromRubber
- Issue Time
- Nov 2,2026
Summary
Drainage hole diameter decides what passes and what blocks; spacing decides whether the base can carry a load. This article covers open area calculation, ligament width, pin deflection in the mould and how to test a sample with real food.
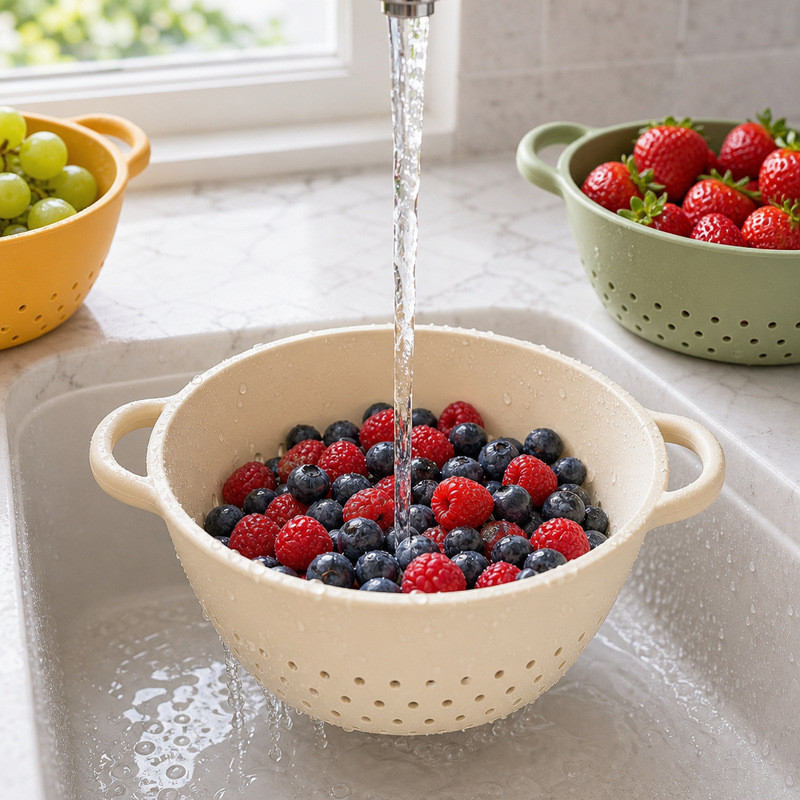
A customer rinses a cup of rice, and half of it ends up in the sink. Another buys the same colander for berries and finds the base has become a sieve for the small ones. A third complains that the holes clog with herb stems and are impossible to clean with a brush. All three bought a product with "drainage holes", and all three bought a different problem, because the holes were specified as a number rather than as a dimension.
Hole diameter and hole spacing are two separate decisions with two separate consequences. Diameter decides what passes and what blocks. Spacing decides whether the base can still carry a load. Specifying one without the other is how a colander ends up either blind or floppy.
Drainage holes are usually drawn as a pattern, which makes them look like a decorative decision. They are not. Each hole is a pin in the tool, a gap in the load path, and a lip that holds a film of water when the flow stops.
Three numbers decide how the finished product behaves: the aperture at its narrowest point, the width of material left between adjacent holes, and the total open area as a share of the base.
Why Are Drainage Hole Details Important in a Silicone Colander?
On a rigid colander, the holes are punched in a sheet that does not move. On a silicone colander, the holes are moulded into a base that flexes every time the product is lifted with food in it. The holes change shape with the base, and the material between them is doing structural work that a metal colander never asks of its base.
That is why the usual advice, add more holes, so often disappoints. More holes increase open area and reduce the material available to carry load at the same time. Past a certain density, the base stops behaving like a perforated plate and starts behaving like a net.
Water drains more slowly than expected
Flow through a set of small holes is limited by the total open area and by the resistance at each opening, not by the number of openings. Twenty holes of 1.5 mm pass less water than eight holes of 3 mm, because open area scales with the square of the diameter while the count scales linearly.
The arithmetic is worth doing once on a drawing. For holes on a square pitch, open area as a percentage is 78.5 multiplied by the square of the diameter divided by the square of the pitch.
| Hole diameter | Pitch, centre to centre | Open area | Material between holes |
|---|---|---|---|
| 3 mm | 6 mm | about 19.6% | 3.0 mm |
| 3 mm | 5 mm | about 28.3% | 2.0 mm |
| 3 mm | 4 mm | about 44.2% | 1.0 mm |
| 2 mm | 4 mm | about 19.6% | 2.0 mm |
| 2 mm | 3 mm | about 34.9% | 1.0 mm |
Read the last column before the third. The same open area can come from very different pin sizes, and the material left between the holes is what decides whether the base survives being lifted with food in it.
There is a second limit that drawings rarely show. Water has to rise over the lip of each hole before it can leave, so the base retains a film roughly as deep as the wall is thick. On a 1.5 mm base, that is a 1.5 mm film across the whole wetted area, and no additional holes remove it. Chamfering the hole on the inside face lowers the lip and drains the base further, which is a tooling decision rather than a hole-count decision.
Small holes can become blocked by food residue
Blocking is a threshold effect, not a gradual one. Particles whose smallest dimension is comfortably smaller than the aperture pass; particles close to the aperture arch across it and stay. Once one particle is lodged, the effective opening is smaller for the next one, and the blockage spreads.
As a working guide, an aperture needs to be roughly two to three times the smallest dimension of the material it must pass before it stops arching reliably. That is why a colander designed for rice and one designed for potatoes cannot share a hole pattern, even if they share a body.
The shape of the particle matters as much as its size. Herb stems and tea leaves are long and flexible: they fold and thread through an aperture that a round particle of the same width would not pass. Onion skin is thin and flat and behaves like a small sheet, sealing an opening rather than passing through it. A pattern tested with peas tells you very little about either.
Cleaning the drainage holes may take more time
Every hole has an edge, and every edge is a place where residue collects. A sharp moulded edge on the inside face gives residue something to key into, and a hole with a visible pin mark or a ring of flash is worse, because the flash catches fibres and skin.
Cleaning difficulty is not proportional to hole count alone. It is proportional to the total length of hole edge multiplied by how accessible that edge is. A hundred small holes in a flat base present a long edge that a brush can reach; forty holes in a curved base with a raised lip present less edge but in a place a brush cannot reach, which is worse in practice.
What Problems Can Occur When Drainage Holes Are Too Closely Spaced?
Too little material between holes can weaken the structure
The material between adjacent holes, usually called the ligament, is what carries load across the perforated area. As holes get closer, the ligament narrows, and a narrow ligament bends more under the same load. When it bends, the holes either side of it change shape, and a distorted hole grips residue more aggressively than a round one.
There is a second effect that is easy to miss on a drawing: the ligament is in tension when the colander is lifted, and silicone tears from a nick far more readily than from a smooth section. A 1 mm ligament between two 3 mm holes has very little material to distribute that load, and any moulding defect at the hole edge becomes a crack starter.
A practical starting point is to keep the ligament at least as wide as the hole diameter, and to widen it further near handles, rims and any point where the product is gripped. That is a starting point, not a rule: the ligament that works depends on the wall thickness, the compound and how the product is lifted.
Closely spaced holes may make the bottom feel too flexible
Perforating a base removes its continuity. A base with 40 percent open area is closer to a mesh than to a plate, and it will oil-can under load: the centre drops, the perimeter lifts, and the product feels unstable even though nothing has failed.
The user reads that movement as flimsiness, and they are not wrong. A base that changes shape under a normal load will also change the flow path, so closely spaced holes can make drainage worse in use than it was on the bench, for the same reason a flat base loses its fall when it sags.
Hole layout can affect mold design and production
This is the part buyers rarely see, and it constrains everything above. Each hole is formed by a pin, and the pin has to survive the moulding cycle without bending, wearing or breaking.
A pin's resistance to bending falls sharply as it gets longer and thinner: deflection under a given lateral load scales with the cube of its free length and inversely with the fourth power of its diameter. Doubling a pin's length makes it eight times as flexible. That is why very small holes in a deep part are difficult to hold to size, and why a pattern that looks elegant on screen can be impractical in the tool.
A pin that flexes produces a tapered hole. The aperture at the cavity face is slightly larger than at the core face, and the "3 mm hole" on the drawing is 3 mm at neither end. Since the effective aperture is the smaller of the two, the product drains like a smaller hole than specified, and the mismatch varies across the pattern depending on how well each pin is supported.
As a working guide, keep a pin's free length under roughly eight times its diameter, and support it if the design needs to go deeper. Below about 1 mm, pin cost, breakage and hole-to-hole variation all rise quickly, and the commercial case for that aperture has to be strong.
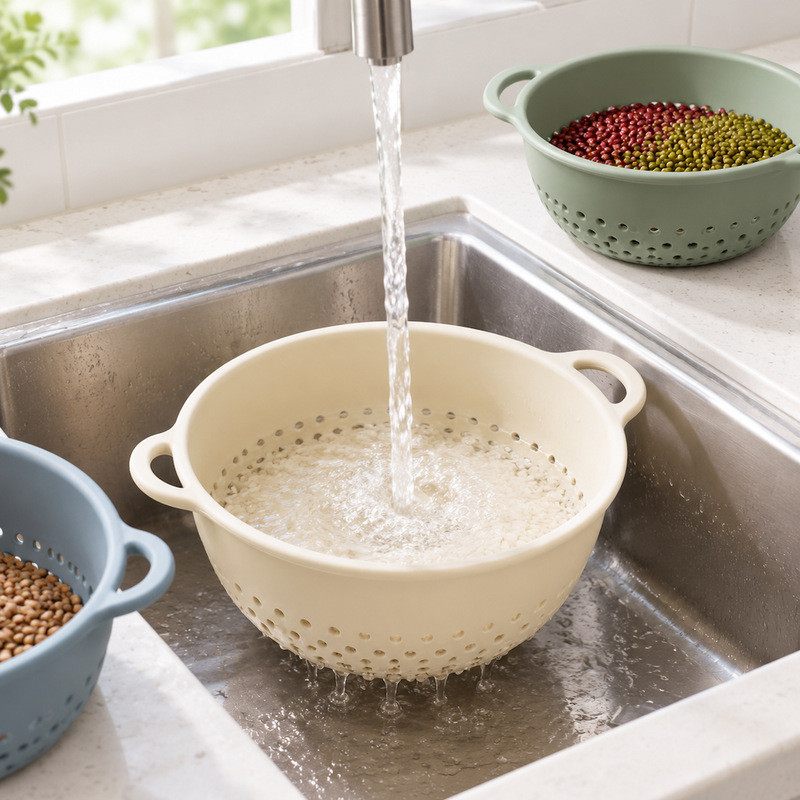
Rice exposes the limit of a single aperture. Whole grains are retained by an aperture below their width, but the broken grains and the fine starch that clouds the water want the opposite. No hole pattern satisfies both, which is why rice rinsing is usually done in a bowl with a swirl and a pour rather than in a colander.
Knowing which job a product is really for is more useful than adding a compromise aperture that does neither job well.
How Should Buyers Choose the Right Drainage Hole Size and Spacing?
Start with the type of food or material being drained
Write down two things before looking at any drawing: the smallest item that must stay in the colander, and the largest item that must pass through it.
If those two numbers do not overlap, the aperture is easy: choose something between them with margin on both sides. If they do overlap, as with rice and broken rice, or herbs and their leaves, then the product cannot do the job with holes alone and the design needs a different answer, such as a finer secondary surface or a different rinsing method.
What does not work is copying an aperture from a product in a different category. A colander for pasta and a colander for berries look similar and have almost nothing in common hydraulically.
Consider both water flow and food residue retention
Flow and retention pull in opposite directions, and the balance point depends on which failure the customer will complain about. Losing a blueberry is a visible, immediate complaint. Draining ten seconds slower is a mild annoyance that rarely gets reported and quietly damages repeat purchase.
When the two conflict, it usually pays to favour retention and recover the flow by improving the base shape, chamfering the holes, or extending the perforated area over the lower wall rather than adding rows to a flat base. Flow can be recovered by geometry; a lost berry cannot.
Leave enough material between adjacent holes
Ligament width should be set from the load the base has to carry, not from how the pattern looks. In practice that means wider ligaments near the handles and the rim, and narrower ones in the middle of the base where the bending moment is lower.
A uniform pattern is easier to tool and easier to draw, and it is the reason many colanders fail at the handle rather than in the middle. Varying the pitch so that the pattern thins out towards the centre costs nothing in tooling and distributes material where it is needed.
Distribute holes according to the basket shape
On a round colander, water collects at the lowest point of the base and along the curve where the base meets the wall. A pattern that follows those two zones drains faster than a grid that covers the whole base evenly, because every hole is placed where water actually arrives.
Sidewall holes serve a different purpose: they let water out when the colander is tilted, and they let air in behind the flow. On a hanging product the base does the same job under a load that keeps changing shape, which designing the base so water actually leaves deals with. They do not help a colander sitting flat, and they weaken the wall at its most highly stressed point, so they should be fewer and placed below the widest part of the body.

Heavy contents change the load case as well as the drainage case. A base holding two kilos of potatoes is being asked to span between its supports with far more load than a base holding herbs, and the perforated area is where it will bend first.
That is the argument for a spine of unperforated material from handle to handle, and for keeping the densest part of the pattern away from the centre of the span.
How Can Manufacturers Evaluate Drainage Hole Designs Before Mass Production?
Review the hole layout during the design stage
Three checks belong on the drawing review, before a tool is cut. First, calculate open area from the actual pitch, not from the hole count. Second, mark the narrowest ligament and confirm it is wide enough for the load the base will see. Third, list every aperture in the pattern and confirm the pin's free length against its diameter.
The third check is the one that changes designs most often, because it is the one that turns a pattern into a tooling problem. A layout that needs 0.8 mm pins in a 10 mm deep base is not a layout that can be held to tolerance at a sensible cost.
Test water flow and residue retention with samples
Test with the actual food, in the actual quantity, with the tap at the flow rate a household uses. Time how long the product takes to stop dripping, and look at what is left in the base.
Then test the failure case deliberately: run the material that is most likely to block through the product, and see whether the blockage clears with a shake or needs a brush. A colander that requires a brush after every use has a design problem that no cleaning instruction will solve.
Check the product after repeated bending and cleaning
Flex the base, lift it loaded, and rinse it twenty times, then re-examine the ligaments. What you are looking for is a change in hole shape near the handles and a whitening at the ends of the narrowest ligaments, both of which indicate that the pattern has removed too much material from a loaded region.
Also check the hole edges. A pin that has worn slightly leaves a ring of flash, and that flash is where residue collects first. This is a tooling maintenance issue rather than a design one, but it shows up as a design complaint, so it is worth checking on early samples and again after a production run.
What Should Buyers Provide When Requesting a Custom Silicone Colander?
- Overall dimensions, capacity and the weight the colander must hold when lifted.
- The foods it must retain and the foods it must pass, with the smallest relevant dimension of each.
- Any reference aperture, pitch or pattern from an existing product, and what is wrong with it.
- Target hardness and wall thickness, or the load case if those are still open.
- Whether sidewall drainage is required, and where the product will be tilted in use.
- Colour, surface texture and whether the texture may cross the perforated area.
- Whether a new mould is needed, and whether the pattern can be adjusted after the first sample.
Conclusion: Good Drainage Hole Design Is About More Than Adding More Holes
Aperture, pitch, ligament and pin geometry are one decision set. Change the aperture and the pin changes; change the pitch and the ligament and the load path change with it. The pattern that drains best is the one where all four were checked against each other on the drawing.
The number of holes is the least useful of the four numbers, and it is usually the only one on the brief. If the pattern is still open at quotation stage, when a hole pattern is worth the tooling is the faster conversation.
Will adding more holes make a silicone colander drain faster?
Only until the material between holes becomes the limiting factor. Open area grows with the square of the diameter, so fewer larger holes usually outperform many small ones, and a base with too little ligament flexes and changes the flow path.
Are larger drainage holes always better?
No. Larger holes drain faster and lose small food. The right aperture sits between the smallest item that must be retained and the largest that must pass, with margin on both sides.
Why do the holes in my silicone colander vary in size?
Because each hole is formed by a pin, and a pin that flexes during moulding produces a tapered hole. The aperture differs between the two faces, and the difference varies across the pattern depending on how well each pin is supported.
What is the minimum material I should leave between holes?
A practical starting point is a ligament at least as wide as the hole diameter, widened near handles and rims where the load is highest. The final figure has to be confirmed against the wall thickness, the compound and the way the product is lifted.
Sources and related reading
- How hole layout affects water flow — the flow side of the same trade-off.
- Release direction and parting line planning — why thin, perforated parts need the tool planned around them.
- Wall transitions, stress whitening and cracking — what happens at a ligament that is too narrow.
- ASTM D2240 — Durometer hardness of rubber — the hardness test behind the compound figures quoted for a colander sample.
The relationships described here are geometric and mechanical. Actual drainage and retention depend on the food, the tap flow, the base shape and the moulded aperture, and should be verified on your own sample with the contents the product is intended to handle.
Working on a colander or strainer?
Tell us what the product must retain, what it must pass, and how heavy it gets when lifted. Those three answers usually settle the aperture and the pitch before any tooling is discussed.
- Email: nani@fromrubber.com or karl@fromrubber.com
- WeChat / WhatsApp: +86 18676210913
- FromRubber, Dongguan Bohao Electronic Technology Co., Ltd. — custom silicone parts for kitchen and household products. Colanders and strainers are moulded alongside the rest of the silicone kitchen tools and kitchenware.