Why Does a Silicone Heat Transfer Label Fail on Stretch Fabric?
- Share
- publisher
- FromRubber
- Issue Time
- Oct 9,2026
Summary
Edge lifting, cracking and post-wash detachment on stretch fabric are different faults with different causes. This article explains how elastic recovery loads the bond line, how to identify the failure interface, and how to reduce risk before bulk production.

The first pressed sample looks right. The lab checks adhesion, signs it off, and the label goes into production on a polyester-spandex legging. Three weeks later the returns start arriving with the same complaint: the logo is lifting at one corner. Nothing about the material changed between the lab sample and the bulk run — but the lab sample was never stretched, and the garment is stretched every time it is put on.
Failure of a silicone heat transfer label on stretch fabric is usually described as one problem and is actually several. An edge that lifts immediately after pressing is a different fault from a label that survived the first week and then cracked along a thin feature. The first is usually a bonding or process problem; the second is often a construction problem. Treating them as the same thing is why so many fixes are applied to the wrong variable.
What the Failure Actually Looks Like
Edge lifting
Separation normally starts at a corner or along the perimeter, because that is where the stress concentrates when the fabric moves. A label lifting only at the corners right after pressing points towards contact and pressure rather than towards the material.
Partial or complete detachment
Local separation — one area releasing while the rest stays bonded — usually indicates uneven contact: a seam, a fold, a thicker zone of fabric, or a platen that is not applying the same pressure across the whole label. Failure across the entire bonding area points somewhere else entirely, towards an incompatible system or a process that never achieved the required conditions.
Cracking or permanent distortion
Here the bond may still be intact and the label itself is the problem. If the label cannot deform with the fabric, the graphic features carry the load and eventually fail, sometimes with a visible crack along the thinnest section.
Failure after washing
A label that passes an initial peel check and then fails after a few domestic washes has usually been assessed against the wrong criterion. Initial adhesion and laundering durability are not the same measurement.
Failure after repeated stretching
Garments can pass a flat visual inspection and still fail in wear, because the label was never asked to survive the cycle that actually matters: stretch, recover, stretch again, hundreds of times.
Each of these symptoms can have more than one cause. Diagnosing by symptom alone is how a fix gets applied to the wrong stage of the process.
The image on the right shows a thin transfer label on a white jersey being flexed. This is the behaviour the label has to match: it must move with the fabric and return with it, without cracking and without taking the fabric surface with it.
A useful early test is to flex a pressed sample by hand and look at the label under raking light. Cracks and stress whitening along thin elements often show up before any edge lifting does.

Why Stretch Fabric Makes the Job Harder
Elastic recovery creates repeated mechanical stress
Every wear cycle applies and releases a load across the bond line. The label does not have to fail once; it has to survive the accumulation. Fabrics with high recovery pull back against a label that does not, and that mismatch is applied at the perimeter where the bonded area ends.
The amount of elastane in the fabric is a rough guide to how much movement the label will see. In published sourcing guidance for stretch textiles, everyday basics and casual wear typically carry about 2–5% spandex in a cotton or polyester blend, while performance activewear often runs 10–20% for stronger recovery. The higher the elastane content, the more load reaches the bond line on every wear.
The fabric and the label deform differently
A knit can extend by a large proportion of its length at low force. A moulded silicone label extends far less. When both are bonded together, the difference in stiffness concentrates stress at the interface, and the perimeter sees the highest loading because that is where the bonded region stops.
Knit structure changes the real contact area
A knit surface is a field of loops, not a flat plane. The bonding system only adheres where it actually contacts the fibre. A dense, flat knit presents a large contact area; an open or highly textured knit presents far less, so a label that works on one may behave differently on the other even when the fibre composition is identical.
Blends complicate the picture
Polyester-spandex, nylon-spandex and similar blends each combine a fibre with a specific surface chemistry and an elastomer that changes how the fabric moves. What qualifies on one blend does not carry automatically to another.
Curved and mobile areas raise the load
A label on the flat of a back panel experiences a different loading history from one on a waistband, a cuff, a knee or an elbow. The same label and the same process can pass in one location and fail in another.
Moulded, Screen-Printed or Heat Transfer: What Changes on Stretch Fabric
Most stretch-fabric failures are discussed without first agreeing which of the three constructions is in play, and the three do not fail for the same reasons. Moulded, screen-printed and heat transfer silicone labels differ in how they attach, how much detail they can carry, and how they behave when the garment recovers.
| Construction | How it attaches | Typical detail level | Behaviour on stretch fabric | What to verify |
|---|---|---|---|---|
| Moulded silicone label | Sewn on, or fixed with a separate bonding layer | Set by the mould cavity and the wall thickness | Does not stretch with the fabric, so load concentrates at the sew line or the bond perimeter | Attachment method, part size relative to the movement, edge design |
| Direct screen-printed silicone | Cured directly onto the textile surface | Set by the screen mesh and the ink rheology | Has no separate carrier, so it moves with the fabric rather than against it | Cure conditions, surface treatment on the fabric, laundering durability |
| Silicone heat transfer label | Pre-formed film applied with heat and pressure, then the carrier is peeled away | Defined when the film is produced, before it meets the garment | Film moves with the fabric, but the bond line and the film's own flexibility decide the perimeter | Press window, peel method, cooling or settling time before testing |
That distinction matters for diagnosis. A perimeter that lifts on a sewn moulded part points at the attachment and the part geometry; the same symptom on a heat transfer label points at the bond line and the application window instead.
The Main Causes, and How to Tell Them Apart
An incompatible bonding system
A label engineered for one textile construction may simply not adhere reliably to another. This is the most expensive cause to miss, because no adjustment of the press will fix it.
Temperature, pressure or time outside the specified window
Insufficient heat or pressure can leave areas that never fully bonded, while excessive heat or pressure can damage the garment or the label system itself. Universal press settings do not exist: the label supplier's specification, confirmed on the actual fabric and equipment, is the reference. Raising the temperature without knowing the cause is a common way to make things worse.
For scale, a published application manual for silicone printing heat transfer describes a back press at 155–160 °C, 2–4 kg and 15–20 seconds with cold peel, notes that a hot peel has to be completed within about five seconds, and states that an applied transfer should stand for a minimum of 24 hours before any physical or washing test. Treat those figures as one supplier's published window rather than a universal setting — the same document warns that different fabrics and fabric thicknesses change the parameters, and that customers should confirm them on samples.
Uneven pressure or poor contact
Seams, fabric thickness variation, wrinkles and a worn platen all reduce contact somewhere on the label. The result is a partially bonded label that looks acceptable until it is stretched.
Surface finishes and treatments
Moisture-repellent finishes, softeners, coatings and other treatments change the surface the bonding system has to grip. Not every treated fabric fails, but treated fabrics should never be treated as equivalent to untreated ones without testing.
Stiffness or a construction that does not suit the application
Thickness, geometry, edge design and overall flexibility determine how the label distributes the stress imposed by the fabric. A label that is too stiff or too small for the deformation it will see will fail at its perimeter regardless of process quality.
Handling after application
Where a system specifies cooling, curing or a waiting period, skipping it weakens the result. Rush handling is a frequent cause of failures that only appear after the garment reaches the customer.
Validation that never tested the real conditions
An initial adhesion check says the label stuck today. It says nothing about whether it will survive stretching and laundering, which is what the garment actually experiences.
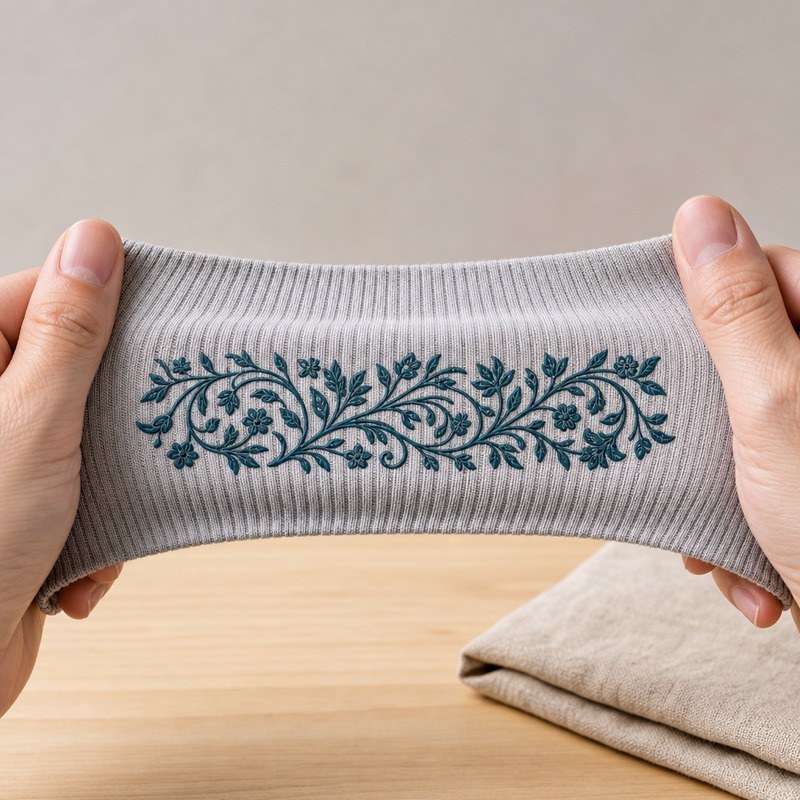
The image on the left shows a floral transfer held under tension across two hands. This is the load case that decides most failures, and it is rarely reproduced in a standard adhesion check.
If your validation does not include a stretch-and-recover cycle on the production fabric, it is not testing the dominant failure mode for this garment type.
Finding the Actual Cause
- Identify where the separation happens. Determine whether the failure is at the fabric-to-bond interface, inside the label construction, or in the fabric itself.
- Compare a failed sample with an unused one. Look for differences in the bonding layer, the label edges and the fabric surface where the label was.
- Review the application records. Check temperature, pressure, dwell time, equipment consistency and whether the recorded settings match the specification.
- Confirm the fabric composition and finish. Compare the failed fabric with the material used during the original sample approval.
- Reproduce the problem under control. Change one variable at a time rather than adjusting the whole process at once.
- Test stretching and washing separately. This shows whether the failure is driven by deformation, by laundering, or by the combination.
A visual check narrows the possibilities, but it does not replace controlled testing where the garment specification calls for it.
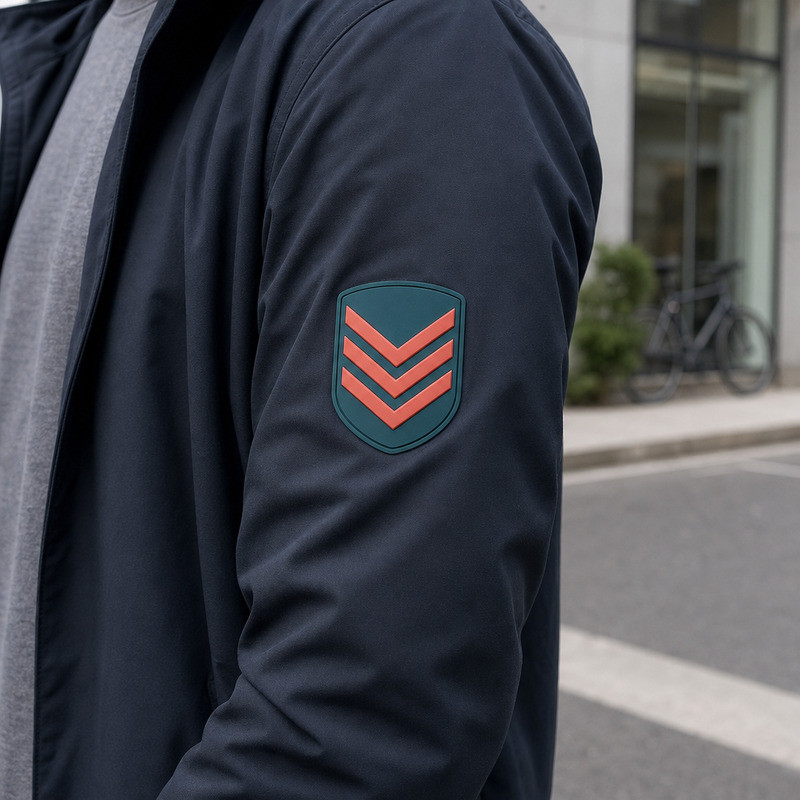
A definite failure of the perimeter is shown on the right: the label has lifted along one edge while the rest of the bonded area is still attached. That pattern points towards local stress concentration rather than a wholesale bonding failure.
Comparing the exposed fabric underneath with an unused sample is the next step. If fibre or finish has come away with the label, the interface has failed at or inside the fabric rather than at the label.
Reducing the Risk Before Bulk Production
Match the label construction to the textile
Base the selection on the actual garment fabric and the way it deforms, not on a generic description of the fibre.
Confirm compatibility on the production fabric
Apply a sample to the fabric that will actually be used, from a representative production lot, rather than an assumed equivalent.
Establish controlled application parameters
Record the approved temperature, pressure, time and post-application handling, and treat that record as the process definition.
Review flexibility and geometry
Dimensions, thickness, corner radii and overall construction all influence how a label behaves on a moving garment. Small changes here are often more effective than process adjustments.
Validate against realistic conditions
Stretch, recovery, laundering and visual inspection should be part of the release criteria for garments that will be worn under load. Two practical details from published application guidance are worth adopting: allow a settling period before testing — one supplier manual asks for a minimum of 24 hours after application before any physical or washing test — and grip the garment at least 5 cm away from the design when stretching it, rather than pulling from the centre of the print. Testing too early, or pulling from the middle of the label, produces results that do not reflect wear.
Keep the fabric and label batches traceable
Recording material and process changes makes it possible to explain a recurring failure instead of re-testing from the beginning.
What to Give a Silicone Heat Transfer Label Manufacturer
- Fabric composition, including the percentage of elastane or other stretch fibre.
- Fabric construction and weight, where available.
- Surface treatments, coatings or finishes.
- Intended garment and placement on the body.
- Expected degree of stretch and recovery.
- Label dimensions, thickness and design file.
- Application equipment and the settings actually used.
- Required washing and durability conditions.
- Photographs of the failed label and of the exposed fabric surface.
With those details, a manufacturer can assess the label construction and identify which part of the system needs further testing, rather than guessing at the whole process.
Frequently Asked Questions
Why does a silicone heat transfer label peel off stretch fabric?
Usually through a combination of bonding compatibility, process conditions, fabric surface characteristics and repeated deformation. Because more than one factor is normally involved, the failure interface has to be inspected before any change is made.
Can silicone heat transfer labels be used on spandex fabrics?
They can be, and suitability depends on the specific textile, the label system and the application method rather than on the fibre name alone. The combination has to be tested on the actual fabric.
Why does a label pass the first inspection and then fail after washing?
Initial adhesion shows that the label bonded today. Laundering durability is a separate property, tested with different criteria, and one does not predict the other.
Can a higher pressing temperature stop the peeling?
It can make it worse. If the cause is an incompatible bonding system, uneven contact or a construction that cannot deform with the fabric, extra heat will not correct it and may damage the garment or the label.
Is the peeling caused by the silicone or by the adhesive layer?
The failure interface answers that question. A label that comes away cleanly with the fabric surface intact indicates a release at the interface, while fibre or finish pulling away with the label points to a failure inside the fabric or its treatment.
Sources and further reading
- Tensile testing of fabrics — ISO 13934-1 strip method, covering maximum force and elongation of woven and knitted fabrics. https://www.shimadzu.com/an/apl/16706/index.html
- ISO 6330:2021 — domestic washing and drying procedures for textile testing, used to define laundering conditions in durability protocols. https://www.jamesheal.com/standards/iso-63302021
- Silicone heat transfer application guidance, including the role of temperature, pressure and dwell time. https://www.visionsub.com/silicone-heat-transfer-application-tips/
- How silicone heat transfer labels differ from other labelling methods, and where their flexibility is an advantage on movement-heavy garments. https://www.colorpglobal.com/news/the-difference-between-silicone-heat-transfer-labels-other-labeling-methods/
- Silicone printing heat transfer product user manual, listing published application conditions (back press 155–160 °C, 2–4 kg, 15–20 s, cold peel), peel timing, the 24-hour settling period and stretch-test handling. https://hmjsiliconesticker.com/wp-content/uploads/2024/02/HMJ-Silicone-Printing-Heat-Transfer-application-instruction.pdf
- Fabrics that stretch: a B2B sourcing guide covering spandex content (about 2–5% in everyday basics, 10–20% in performance activewear), stretch direction and recovery. https://www.mh-chine.com/blog/products/fabrics-that-stretch
Reliable performance on stretch fabric is a property of the whole system: the textile, the label construction, the bonding system, the application conditions and the way the garment is used. Validate the label on the actual production fabric, with the actual equipment, before bulk application.
About this guide
This article was prepared by the engineering team at FromRubber (Dongguan Bohao Electronic Technology Co., Ltd.), which develops custom silicone heat transfer labels and silicone patches for apparel. Sample evaluation is carried out on the customer's production fabric so that compatibility and deformation are assessed together rather than assumed.
Related product pages: Custom Heat Transfer Patches, heat transfer silicone labels for clothing and heat transfer silicone patches for T-shirts and sweatshirts.
Also in this series on silicone labels and patches: Small Silicone Logo Design on Clothing: How to Keep Thin Lines Visible? · How Small Can a Small Silicone Logo Be on Clothing? · How Does Fabric Type Affect Small Silicone Patch Adhesion? · Silicone Heat Transfer Label on Polyester: What Causes Peeling?