Custom Silicone Backlight Keypad: Design, Light Guide & Manufacturing Guide
- Share
- publisher
- FromRubber Engineering Team
- Issue Time
- Jul 29,2026
Summary
Engineering guide to custom silicone backlight keypads: LED structures, light guide options, laser etching, DFM checklist, manufacturing, testing and cost factors.
Quick Answer
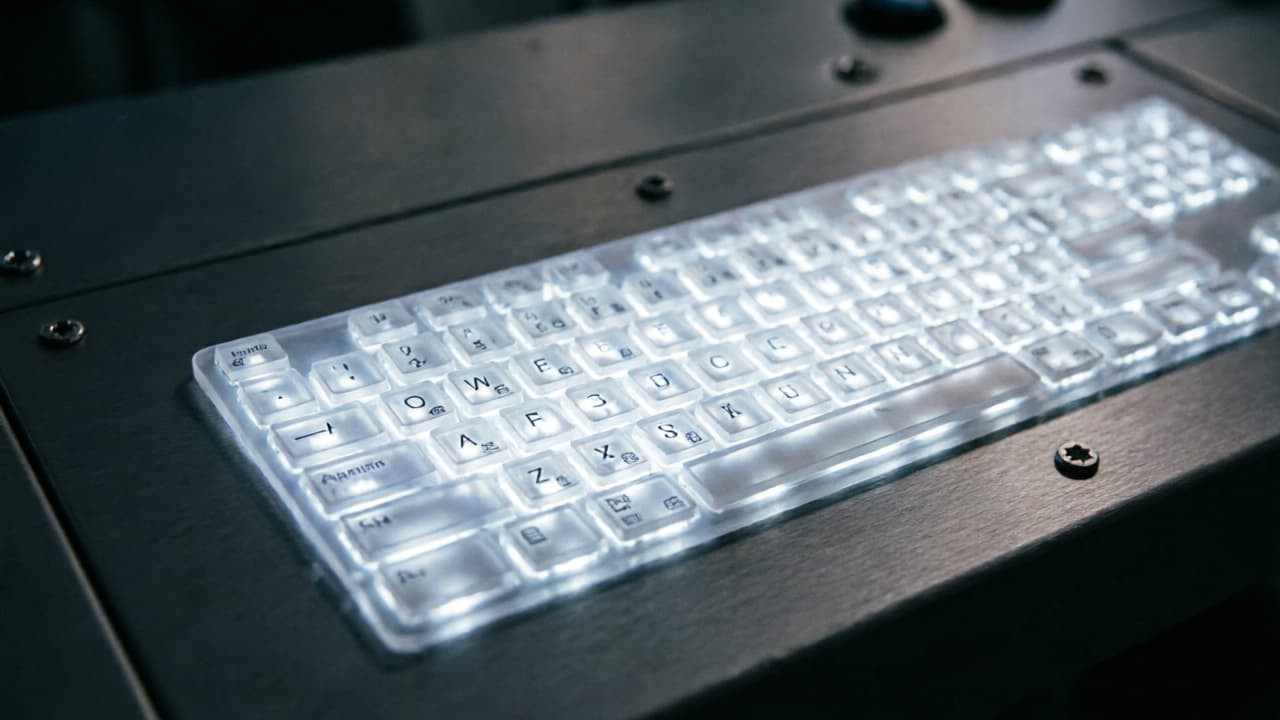
A custom silicone backlight keypad is a molded silicone rubber keypad integrated with LED lighting, translucent or laser-etched areas, conductive contacts, and a PCB/FPC circuit. A good design must control light uniformity, light bleed, actuation force, sealing, and electrical reliability at the same time — which is why backlight decisions should be locked in during DFM, before tooling.
A custom silicone backlight keypad is not just a rubber button with a light placed behind it. Its final brightness, tactile feel, waterproof performance, lifespan, and cost all depend on decisions made long before mass production: the silicone structure, LED position, light guide design, coating stack, laser etching parameters, conductive contact, and the PCB or FPC circuit below.
Many sourcing teams discover this the hard way. A keypad looks fine on a drawing, but the first samples show bright spots, dark corners, or light leaking into the neighboring key. At that point, fixing the problem may require a new coating stack, a revised PCB layout, or even a modified mold — all of which cost time and money.
This guide is written for OEM engineers, product designers, and sourcing managers who need to specify, evaluate, or manufacture a custom silicone backlight keypad. It covers how these keypads are built, how the main backlight design options compare, how to control light bleed and uniformity, what a DFM review should check, how production and testing work, what drives cost, and how to choose a manufacturing partner.
1. What Is a Custom Silicone Backlight Keypad?
A custom silicone backlight keypad is a molded silicone rubber keypad integrated with LED lighting components, light-transmitting structures, conductive contacts, and a PCB or FPC circuit to provide illuminated button functions for electronic devices.
Unlike a standard silicone keypad, a backlit version is an optical component as much as it is a mechanical and electrical one. Light from an LED mounted on the circuit board must travel through or around the silicone body, pass through only the intended areas — usually symbols, icons, or key edges — and appear uniform to the user, while the rest of the surface stays dark.
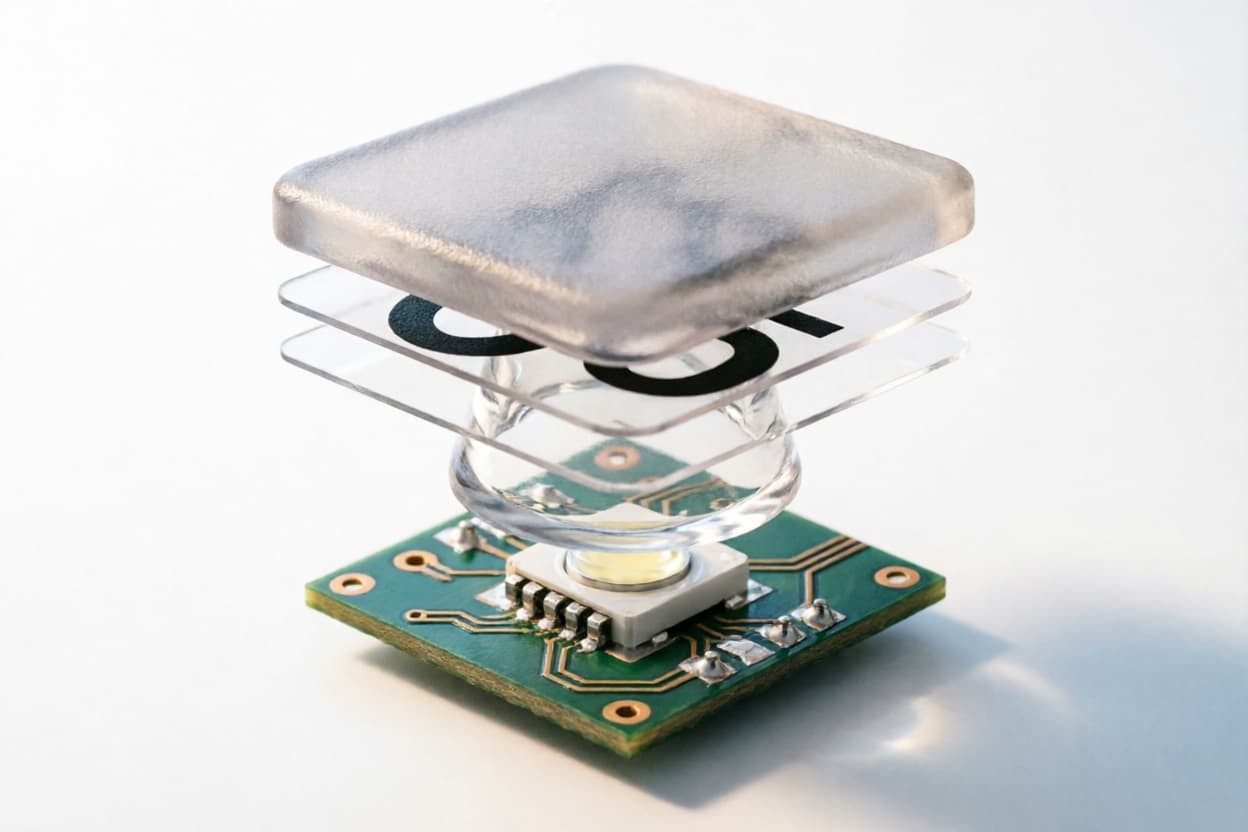
The six core components and what each one controls:
- Silicone rubber body — determines key feel, travel, rebound, sealing potential, and durability.
- Graphic coating / printed legends — defines the visible appearance and blocks light where illumination is not wanted.
- Light-transmitting areas — transparent silicone windows, laser-etched legends, or light pipes that let LED light reach the surface.
- LED light source — usually SMD LEDs on the PCB or FPC; color, brightness, and position all matter.
- Conductive contacts — carbon pills, conductive ink, or metal domes that close the circuit when a key is pressed.
- PCB/FPC circuit — carries the LEDs and switch contacts; its layout directly affects light placement.
Because these layers interact, a backlight keypad can only be optimized as a complete system. Changing the silicone color affects brightness. Changing the coating affects light leakage. Moving an LED changes uniformity. This is why experienced manufacturers review the keypad, circuit, and housing together rather than quoting from a keypad drawing alone.
2. Why Choose Silicone for Backlight Keypads?
2.1 Tactile Feedback and User Experience
Silicone rubber keypads offer a soft, quiet, and comfortable pressing feel that rigid plastic buttons cannot easily match. The molded webbing under each key acts as a spring: it deforms when pressed and snaps back when released, giving the user clear tactile confirmation.
- Soft, quiet operation — important for medical devices, audio equipment, and consumer products.
- Customizable actuation force — typically tuned between roughly 100 g and 300 g depending on application.
- Elastic rebound and long service life — well-designed keypads withstand hundreds of thousands to millions of cycles.
- One-piece sealing surface — no gaps between keys for dust or liquid to enter.
2.2 Flexible Backlight Design
Few interface technologies offer as much lighting freedom as a silicone keypad:
- Symbol illumination — only the legend glows, keeping the background dark.
- Edge and halo lighting — light outlines the key perimeter.
- Single-color or RGB backlight — status indication through color change.
- Multi-zone lighting — different key groups illuminated independently.
- Custom light patterns — logos, icons, and text rendered in light.
2.3 Environmental Durability
Silicone rubber performs reliably where many plastics degrade:
| Property | Typical Performance | Design Note |
|---|---|---|
| Temperature resistance | Approx. -40 to 200 °C, material dependent | Confirm with the selected silicone grade |
| Key life | Hundreds of thousands to millions of cycles | Depends on web design and conductive contact |
| Chemical resistance | Good to excellent | Confirm cleaning agents and environment |
| Waterproof potential | IP65/IP67 achievable | Depends on full assembly, not the keypad alone |
| UV resistance | Material and coating dependent | Critical for outdoor and automotive use |
3. Backlight Design Options for Custom Silicone Keypads
Choosing the backlight architecture is the single most important design decision. Each approach trades brightness, uniformity, durability, tooling complexity, and cost differently.
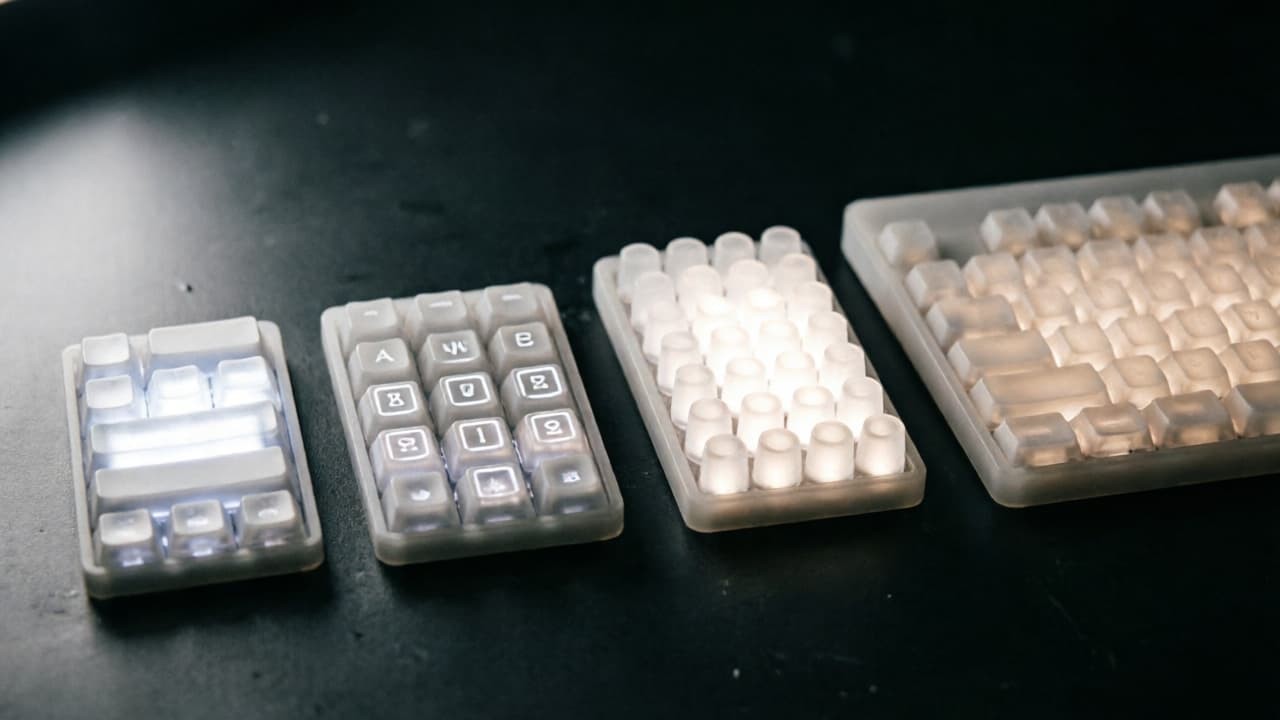
3.1 Transparent Silicone Window
The simplest approach: part of the keypad is molded in transparent or translucent silicone, and the LED shines through it directly.
- Structure: clear or translucent silicone area, sometimes masked by opaque coating elsewhere
- Strengths: simple structure, low cost, fast to prototype
- Limitations: brightness and uniformity depend heavily on silicone thickness and LED position; limited control of light spread
- Best for: simple indicator windows, budget projects, small backlit areas
3.2 Laser-Etched Backlit Legends
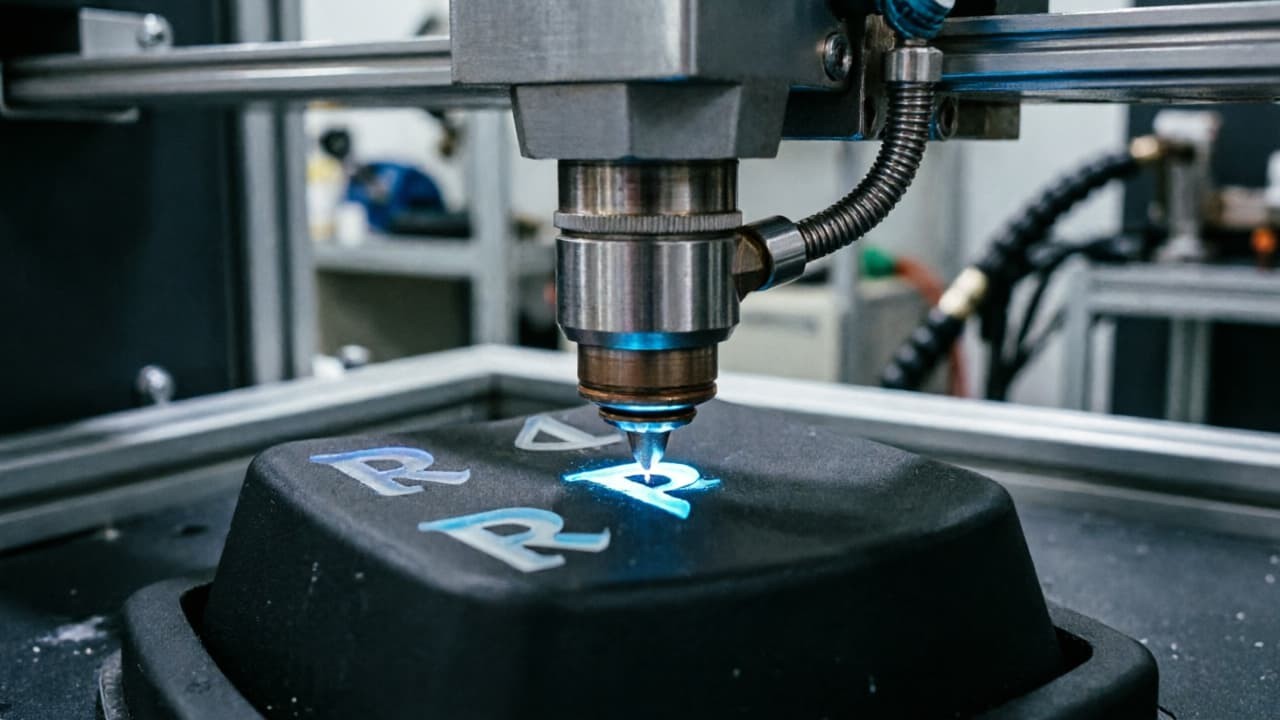
The most widely used professional method. The keypad is molded in translucent silicone, coated with an opaque layer, and then a laser removes the coating precisely where the legend should glow. A protective PU coating is often applied afterward.
- Structure: translucent silicone + light-blocking coating + laser-etched artwork + protective topcoat
- Strengths: crisp, durable illuminated symbols; legends never wear off like surface ink; excellent contrast
- Limitations: coating thickness must be controlled — too thin and light leaks, too thick and the keypad grows stiff or oversized; once coated and etched, the design cannot be altered
- Best for: durable illuminated icons and text, industrial and medical panels
3.3 Silicone Light Pipes
Small, clear silicone posts are molded into the underside of the keypad and sit directly on top of each SMD LED, coupling light efficiently into the key top.
- Structure: clear silicone posts aligned to LEDs, isolated per key
- Strengths: high brightness at low power; good per-key isolation; efficient LED usage
- Limitations: tighter alignment tolerances between keypad and PCB; more complex tooling
- Best for: single-key high brightness, premium panels, low-power devices
3.4 Rigid Light Guide Panel
A thin polycarbonate or acrylic light guide sits between the PCB and the silicone keypad. It captures light from a few strategically placed LEDs and distributes it evenly across a large area using micro-textures or reflective features.
- Structure: separate optical panel + LED array + silicone overlay
- Strengths: excellent uniformity across large key arrays; fewer LEDs means lower power and cost at scale
- Limitations: higher part count and assembly complexity; added thickness
- Best for: large illuminated keypads, control consoles, multi-key backlit panels
3.5 RGB Backlight Silicone Keypad
RGB LEDs under translucent or etched keys allow color changes for status indication, modes, or alerts.
- Strengths: multi-color indication, rich visual feedback, one keypad can signal many states
- Limitations: requires driver circuitry and control logic; higher power and cost; color uniformity across keys needs careful calibration
- Best for: smart devices, gaming equipment, status-driven industrial interfaces
3.6 Backlight Options Compared
| Backlight Solution | Structure | Brightness | Uniformity | Cost | Best For |
|---|---|---|---|---|---|
| Transparent silicone window | Clear/translucent silicone area | Medium | Medium | Low | Simple icons, budget projects |
| Laser-etched legends | Coating + laser etching | Medium-high | Medium-high | Medium | Durable illuminated symbols |
| Silicone light pipes | Clear posts over SMD LEDs | High | High | Medium-high | Single-key high brightness |
| Rigid light guide panel | PC/acrylic guide + LED array | High | Very high | High | Large keypad arrays |
| RGB backlight | RGB LED + control circuit | High | Design dependent | High | Smart devices, status indication |
Practical rule: The larger and more complex the illuminated area, the more value a light guide structure delivers. For a handful of glowing symbols, laser etching over translucent silicone is usually the most cost-effective professional choice.
4. Structure of a Custom Silicone Backlight Keypad
4.1 Silicone Rubber Keypad Layer
The molded silicone body defines how the keypad feels and survives. Critical design parameters include:
- Key top geometry — size, shape, concave or convex surface, embossing
- Webbing design — the thin flexible wall around each key that creates tactile snap
- Actuation force and travel — tuned through webbing angle, thickness, and hardness
- Wall thickness and parting lines — affect moldability, flash, and appearance
- Silicone hardness — balances soft feel against structural stability
4.2 Graphic and Light-Blocking Layer
Surface processes give the keypad its appearance and control where light can escape:
- Screen printing — durable single or multi-color legends on the surface
- Spray coating — base colors and opaque light-blocking layers
- Matte coating — smooth feel, good light blocking, economical protection
- PU coating — superior wear resistance for frequently pressed keys, at higher cost
- Epoxy coating — hard, glossy domed key tops for premium appearance
For backlit keypads, the light-blocking layer is functional, not cosmetic: it is the first line of defense against light bleed. The laser etching process then precisely removes this coating layer only where light should pass through, creating clean illuminated legends with sharp edges.
4.3 Light-Transmitting Structure
The optical path can be formed by transparent silicone, translucent silicone, laser-etched openings, silicone light pipes, or a rigid light guide — covered in detail in Section 3. The key point: the light-transmitting structure must be designed together with the coating — the coating defines where light is blocked, and the structure defines where it flows.
4.4 Conductive Contact
| Conductive Solution | Advantage | Limitation | Best For |
|---|---|---|---|
| Carbon pills | Cost-effective, stable | Not for ultra-low resistance needs | General control panels |
| Conductive ink | Flexible layout | Requires tight process control | Membrane/FPC integration |
| Metal dome | Strong tactile feedback | Higher cost | Fast-response devices |
| Gold/nickel contacts | High reliability | Highest cost | Medical, industrial, high-reliability |
A useful detail for backlit designs: opaque black carbon pills can double as light blockers, preventing light from leaking through the center of the key.
4.5 Circuit Integration
The keypad must integrate with one of several circuit types:
- PCB — rigid, stable, standard for most devices
- FPC — flexible, thin, ideal for tight or curved assemblies
- Membrane switch — thin, sealed, cost-effective for simple interfaces
LED placement on the circuit is part of keypad design, not an afterthought. The distance between LED and key top, the LED beam angle, and the alignment tolerance between silicone and board all determine whether illumination looks even or patchy.
5. How to Control Light Bleed and Improve Uniform Illumination
This is where backlit keypad projects most often succeed or fail — and where engineering experience shows.
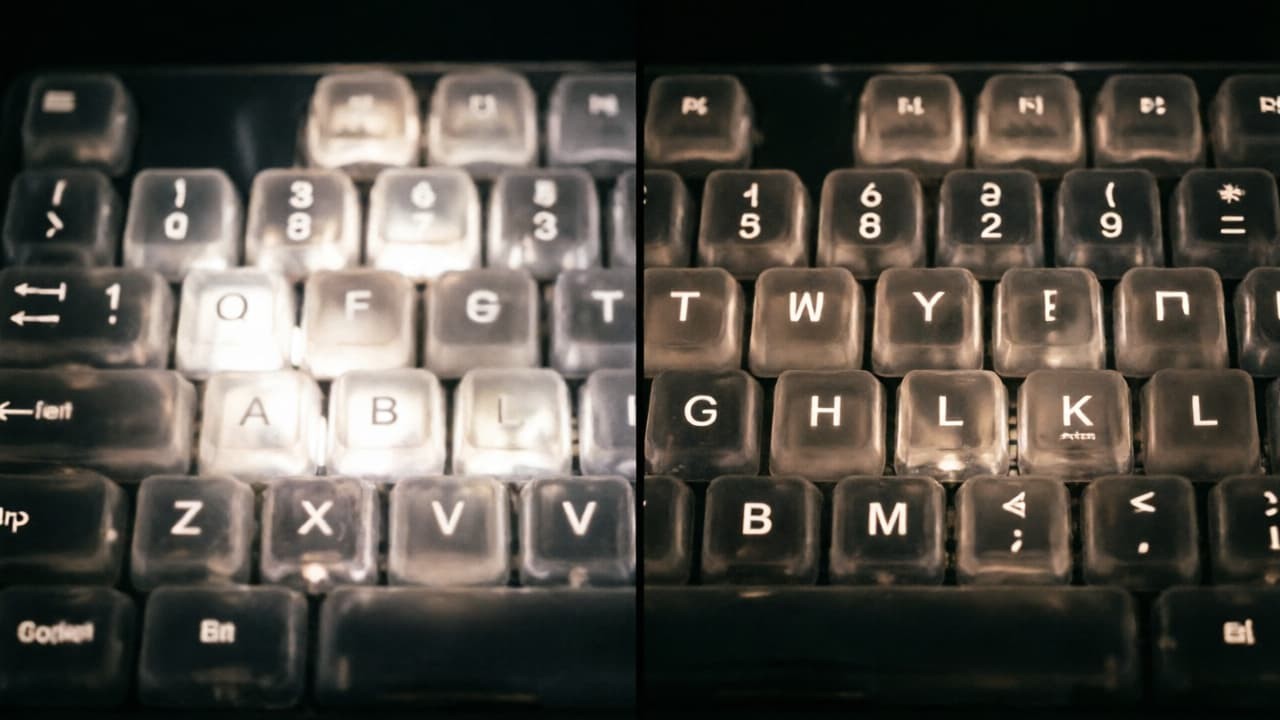
5.1 Common Backlight Problems
- Bright spots — a hotspot directly above each LED
- Dark areas — corners or edges the light never reaches
- Uneven symbol brightness — some legends glow brighter than others
- Light leakage between keys — one key's light illuminating its neighbor
- Edge leakage — light escaping from the keypad perimeter or mounting gaps
- Poor day/night readability — washed out in daylight or glaring at night
- Color shift — coating or pigment changing the LED's apparent color
5.2 Design Solutions
Block what should stay dark:
- Apply an opaque light-blocking coating over non-illuminated areas.
- Use black carbon pills as conductive contacts — they block light through the key center.
- Mold opaque barriers between keys, or use double-shot/insert molding to isolate light chambers per key.
Guide what should glow:
- Match LED position, beam angle, and count to the illuminated area.
- Use silicone light pipes for efficient per-key light coupling.
- Use a rigid light guide panel for large arrays where uniformity matters most.
- Select silicone translucency deliberately — water-clear is not always better; controlled diffusion often looks more even.
Control the process:
- Keep coating thickness consistent — too thin leaks light, too thick kills brightness and adds stiffness.
- Control laser etching depth so it cuts the coating cleanly without damaging the silicone beneath.
- Review the housing and bezel gaps; many "keypad light leaks" actually come from the enclosure.
5.3 The Engineering Rule
Backlight design should be confirmed before mold tooling. If LED position, silicone translucency, coating color, laser etching area, and PCB layout are not reviewed together, the keypad may require expensive mold or circuit modification after sampling.
Insert molding deserves special mention for demanding applications: a clear or translucent silicone window is molded first, then opaque silicone is molded around it in a second shot. The opaque barrier physically isolates each light source, allowing individual keys or indicators to be lit with essentially zero bleed — something coating-and-etching alone struggles to achieve.
6. Custom Silicone Backlight Keypad Design Considerations
6.1 Key Size, Layout and Spacing
- Spacing prevents accidental activation and gives each key room to flex.
- Key height and bezel opening must match the product enclosure.
- Tolerance stack-up across silicone, PCB, and housing decides whether keys sit flush or bind.
6.2 Silicone Hardness Selection
| Hardness | Typical Application | Design Note |
|---|---|---|
| 30-40 Shore A | Soft-touch products | Comfortable, lower actuation force |
| 40-60 Shore A | General control panels | Common balance of feel and stability |
| 60+ Shore A | Industrial applications | Firmer support, less soft feel |
6.3 Light Transmission Requirements
Brightness and color at the key top depend on:
- Silicone color, transparency, and thickness
- Pigment and additives in the material
- Coating color, layers, and thickness
- Laser-etched line width and area
- LED brightness, color, and viewing angle
- Target luminance for the use environment (indoor, outdoor, night operation)
6.4 Waterproof and Dustproof Requirements
Silicone has excellent sealing potential, but the final IP rating belongs to the whole assembly. Design for:
- A continuous sealing lip around the keypad perimeter
- Correct compression amount against the housing — too little leaks, too much stiffens the keys
- Adhesive backing (3M and equivalents) where appropriate
- Air channels so trapped air escapes when keys are pressed
- Cable exits, screw holes, and bezel gaps in the housing, not just the keypad
6.5 Electrical Requirements
Define early:
- Contact resistance and allowable bounce
- Insulation resistance and dielectric strength, where required
- LED voltage, current, and driver circuit
- Circuit layout and connector type
- ESD considerations for exposed interfaces
7. DFM Checklist Before Tooling
A proper DFM review is the cheapest insurance in a backlit keypad project. This is the information a manufacturer needs — and the questions they should be asking.
7.1 Information to Provide
- 2D drawing with dimensions and tolerances
- 3D files (STEP/IGS)
- Key layout and artwork/legend files (AI, CDR, PDF, DXF)
- PCB or FPC drawing with LED positions
- Housing or bezel drawing
- LED specification: color, brightness, viewing angle
- Target actuation force and travel
- Shore A hardness
- Color standard (Pantone/RAL or physical sample)
- Coating and surface finish requirements
- Target IP rating
- Operating temperature and environment
- Compliance needs (RoHS, REACH, medical, food contact)
- Prototype quantity, annual volume, target price, target lead time
7.2 DFM Review Questions
- Is the backlight area moldable as drawn?
- Is any wall too thin to mold reliably?
- Is the legend line width suitable for laser etching or printing?
- Does every LED align with its light guide or window?
- Is there a light bleed risk between adjacent keys?
- Will the bezel over-compress the silicone and stiffen the keys?
- Do the conductive contacts align with the circuit pads?
- Is the coating stack compatible with the backlight effect?
- Is compression molding or injection molding the right process for this design and volume?
Catching any one of these at DFM costs nothing. Catching it after tooling costs a mold revision.
8. Manufacturing Process of Custom Silicone Backlight Keypads
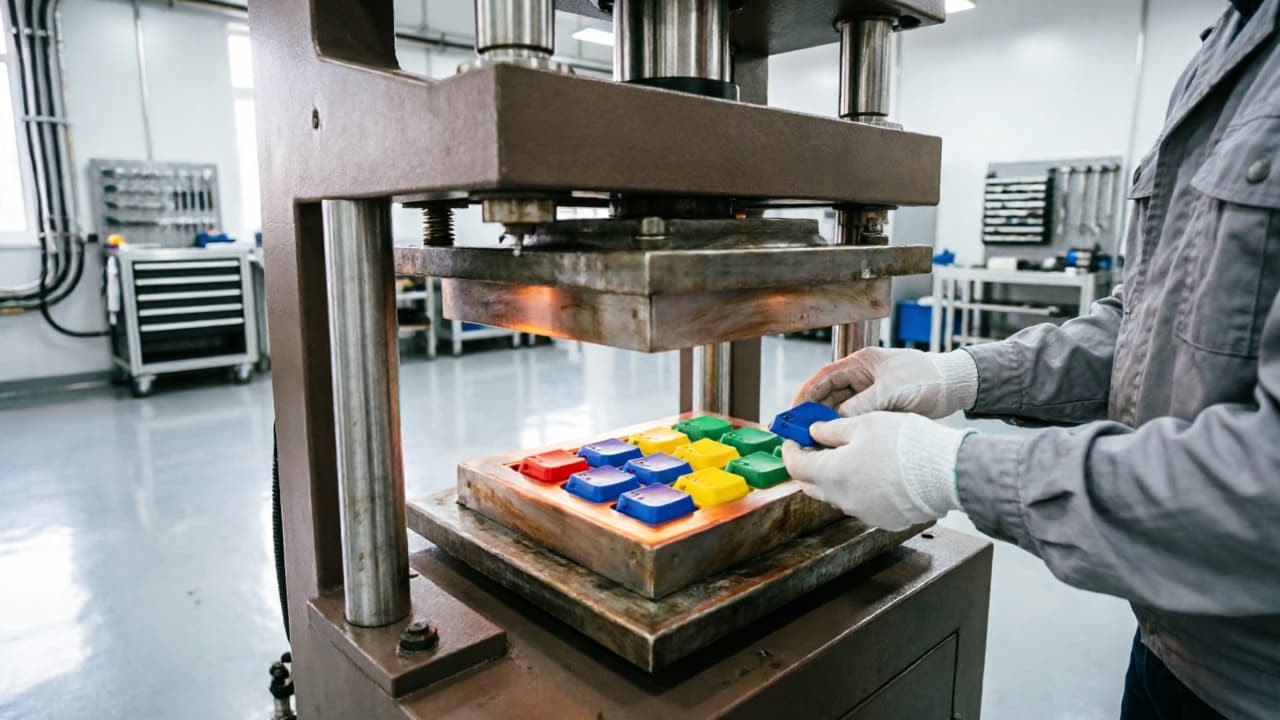
Engineering & DFM Review
The project starts with a joint review of structure, backlight path, materials, moldability, and cost. Material recommendations and structure optimization happen here, on paper, where changes are free.
Mold Design & Tooling
Production molds are machined from tool steel (commonly P20 or NAK80 class) with attention to parting lines, venting, and demolding. Cavity quantity is matched to order volume. For prototypes, soft aluminum tooling can produce 50-200 near-production parts quickly — an effective way to validate feel, fit, and backlighting before committing to steel. Learn more about our silicone mold tooling capabilities.
Silicone Material Preparation
Raw silicone is compounded with pigments and additives to the specified hardness, color, and translucency, then pre-formed into weighed charges matched to each mold cavity. Batch consistency here is what keeps production keypads identical from first to last.
Compression or Injection Molding
Most silicone keypads are compression molded: the pre-formed material is placed in the heated mold and cured under controlled temperature (typically 170-200 °C), pressure, and time. Injection molding suits certain high-volume or liquid silicone (LSR) applications — notably translucent LSR for optical-grade light transmission.
Secondary Processing
This is where a plain molding becomes a backlit keypad: spray coating of base and light-blocking layers, screen printing of legends and graphics, laser etching to open illuminated artwork through the coating, PU/matte/epoxy coatings for protection and feel, and carbon pill bonding or conductive ink printing.
LED / PCB / FPC Assembly
The keypad is integrated with its circuit: SMD LEDs verified in position, contacts aligned, membrane or FPC layers registered, adhesive backing applied, connectors assembled.
Final Inspection & Testing
Every batch passes appearance and dimensional inspection, with functional tests scaled to the application — see Section 9 for the complete test matrix.
9. Testing and Quality Control Standards
A backlight keypad is simultaneously a mechanical, electrical, and optical component. Testing should reflect all three.
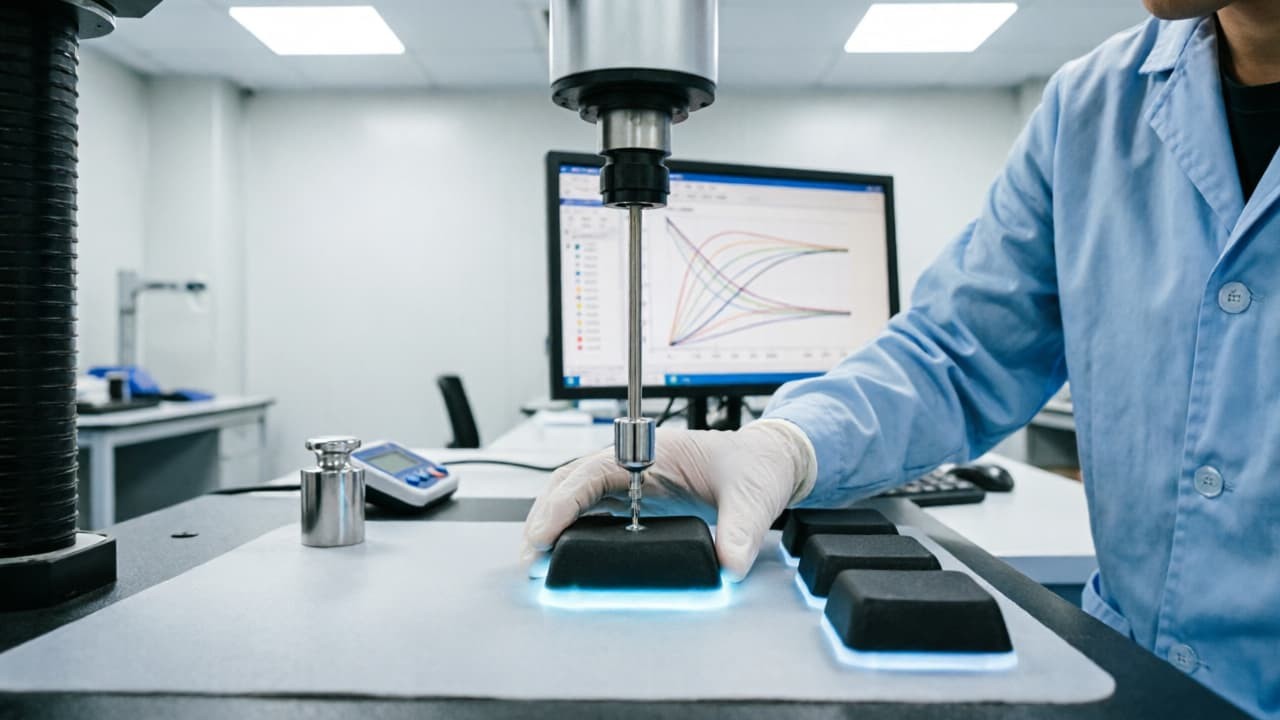
| Test Item | Purpose | Typical Method / Note |
|---|---|---|
| Actuation force test | Confirm tactile feel | Force curve tester |
| Key travel test | Confirm pressing distance | Force-displacement measurement |
| Contact resistance test | Confirm electrical switching | Low-resistance meter |
| Insulation resistance test | Confirm circuit safety | Megohmmeter |
| Dielectric strength test | Confirm voltage endurance | Hipot test, where required |
| LED function test | Confirm lighting | Power-on inspection of every key |
| Light uniformity check | Confirm visual quality | Visual + approved sample comparison; luminance meter where available |
| Waterproof test | Confirm sealing | IP testing per agreed conditions |
| Life cycle test | Confirm durability | Automated pressing to specified cycles |
| Coating adhesion test | Confirm legend durability | Cross-cut, abrasion, or alcohol rub as applicable |
| Environmental test | Confirm application suitability | Temperature, humidity, chemical exposure per spec |
Important: The keypad alone does not guarantee an IP rating or system-level reliability. Final specifications should be confirmed during DFM and sample approval, with the housing, PCB, adhesive, sealing surfaces, and assembly process reviewed as one system.
10. Custom Silicone Backlight Keypad Cost Factors
10.1 Mold Cost
Driven by product size, cavity count, mold steel, and structural complexity. Light pipes, insert-molded windows, and multi-cavity family tools add cost. Prototype aluminum tooling is a fraction of production steel — another reason to prototype first.
10.2 Material Cost
Silicone grade (standard, high-transparency, medical, food-grade), hardness, color matching, and certification requirements all move material cost. Optical-grade translucent materials cost more than general-purpose compounds.
10.3 Surface Process Cost
Each added process — extra print colors, multiple spray layers, laser etching area, PU or epoxy topcoats, light-blocking inks — adds labor, materials, and yield risk.
10.4 Circuit and Assembly Cost
LED count (RGB roughly triples LED cost versus single color), PCB vs. FPC, connectors, metal domes, adhesive systems, and assembly labor.
10.5 Quality and Compliance Cost
IP testing, life cycle testing, RoHS/REACH documentation, and medical-grade documentation where applicable. These are small percentages of project cost and large percentages of risk avoided.
A transparent quotation should break these out rather than handing you a single unexplained number.
11. Applications of Custom Silicone Backlight Keypads
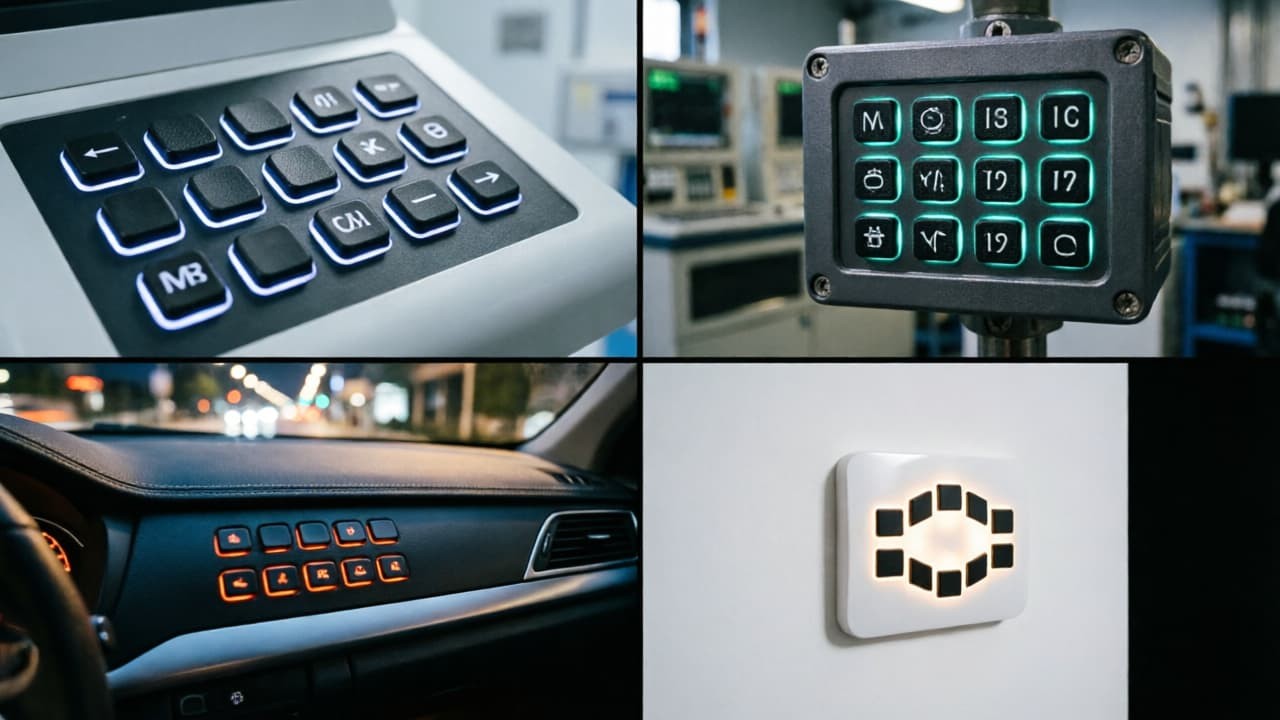
- Medical equipment — patient monitors, diagnostic instruments, handheld devices. Backlit symbols support low-light operation; smooth sealed surfaces withstand repeated cleaning. See our medical device keypads for industry-specific requirements.
- Industrial control systems — machine panels, automation controllers, rugged field equipment. Sealed keypads tolerate dust, oil, and washdown; illuminated legends remain readable in dim plants.
- Automotive electronics — auxiliary control panels, dashboard interfaces. Day/night readability and temperature resistance are the drivers here.
- Smart home and consumer electronics — smart switches, remote controls, gaming devices, where RGB feedback and premium feel differentiate products.
- Security and access control — outdoor keypads and alarm panels needing weather resistance plus night visibility.
- Special equipment — electric wheelchairs (durable illuminated controls), live streaming consoles (fast, error-free operation in dark studios), heated clothing controllers (compact, low-power, flexible integration), POS terminals (high-cycle conductive keypads).
12. Case Studies and Manufacturing Evidence
Real projects teach more than specifications. Four typical patterns from production work:
Behind each of these is the same supporting evidence base: mold workshop, compression molding lines, laser etching and coating stations, and inspection equipment — the full in-house process chain that keeps quality controllable.
13. How to Choose a Silicone Backlight Keypad Manufacturer
13.1 Engineering Capability
A capable supplier provides DFM analysis, backlight structure suggestions, material recommendations, prototyping, and mold design support — before you ask twice. If a supplier quotes a backlit keypad without asking about LED positions, that is a warning sign.
13.2 Manufacturing Experience
Look for silicone molding depth, completed backlight projects, recognizable application cases, and the full process chain in-house: mold making, molding, printing, coating, laser etching, assembly, testing.
13.3 Quality Control System
Incoming inspection, in-process checks, final functional testing, a documented sample approval process, and the test equipment to back it up.
13.4 Customization Capability
Custom colors and hardness, transparent and translucent materials, coating options, laser etching, multiple backlight architectures, waterproof structures, and conductive options — a supplier limited to one backlight method will steer your design to fit their process rather than your product.
13.5 Communication and Quotation Efficiency
A clear quotation input list, fast engineering feedback, realistic lead times, and a defined sample approval workflow. In B2B sourcing, response quality in the first week predicts project quality for the next year.
14. Custom Silicone Backlight Keypad FAQ
Q1: What is a custom silicone backlight keypad?
A molded silicone rubber keypad integrated with LED lighting, translucent or laser-etched areas, conductive contacts, and a PCB/FPC circuit to provide illuminated button functions.
Q2: How do you make a silicone keypad backlit?
Common methods include transparent silicone windows, laser-etched legends, silicone light pipes, rigid light guide panels, and RGB LED integration. The best choice depends on brightness, uniformity, cost, and product structure.
Q3: How do you prevent light bleed in a backlit silicone keypad?
Use opaque coatings, black carbon pills, isolated light chambers or insert-molded barriers, optimized LED placement, proper silicone translucency, controlled coating thickness, and a housing design that seals light gaps.
Q4: Can silicone backlight keypads be waterproof?
Yes. With sealing lips, adhesive backing, and a matching housing, IP65 or IP67 targets are achievable. Final protection depends on the complete assembly, not only the keypad.
Q5: What silicone hardness is suitable for backlit keypads?
Most applications use 30-60 Shore A. Softer material gives a softer touch; harder material gives firmer support for industrial products. Confirm with tactile and durability requirements.
Q6: What information is needed for a quotation?
2D/3D drawings, key layout, artwork, PCB/FPC information, LED requirements, actuation force, hardness, IP rating, application environment, and quantities.
Q7: How long does production take?
Lead time depends on mold development, sampling, testing requirements, and order quantity, and should be confirmed after DFM review.
Q8: What affects the cost of a custom silicone backlight keypad?
Mold complexity, silicone material and transparency, printing and coating processes, laser etching, LED quantity, circuit integration, testing, and order volume.
15. Start Your Custom Silicone Backlight Keypad Project
A backlit silicone keypad is a combined exercise in optics, mechanics, electronics, materials, and process control. The projects that go smoothly share one trait: backlight, structure, and circuit decisions were made together during DFM, with a manufacturer who has the full process in-house.
Send your drawings, samples, or even a rough concept — engineering review and a practical quotation come first.
Contact our engineering team