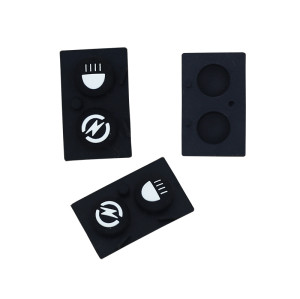
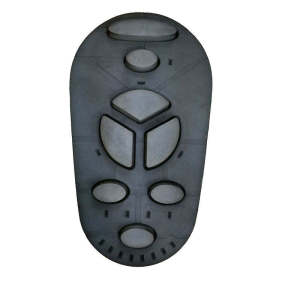
Snap-Fit Plastic Housing Kits for Rubber Button Panels | Perfect Assembly
Item specifics
- Design
- Follow 3D Drawing Or Physical Object
- Process
- Molding
- Feature
- Button Matrix,Conductive,IP68 Rated
- MOQ
- 2000pcs
- Application
- industrial, medical & automotive applications
Review
Description
A rubber button panel only works when it is held at the right height, centred on the right holes, and compressed by the right amount. All three are functions of the housing, not of the keypad. That is why the two parts have to be designed as one tolerance chain: buy them separately and the assembly becomes the place where every tolerance meets. The kit approach solves that. Housing and panel are cut from the same drawing, assembled once at the factory, and shipped as a matched pair - so the gap around a key, the travel of a press and the seal at the perimeter are all decided before either part is moulded. The seat. The panel sits on a land at a defined height. If that land is 0.2 mm low, every key travels 0.2 mm further before it closes; if it is high, the panel is pre-loaded and the keys feel dead. The alignment. Each key has to sit centred in its hole. Off-centre keys bind on one wall, which reads as a stiff key and eventually wears the legend. The seal. On a sealed unit the housing land is the compression surface. It has to be flat, continuous and wide enough to compress the panel flange evenly - a land that runs over a rib or a screw boss cannot do that. A snap arm is a cantilever: its length, thickness and root radius decide how far it can deflect before it yields, and therefore how many times the housing can be opened. Four dimensions belong on the drawing - arm length, thickness at the root, undercut depth and the lead-in angle that guides it home. Two failures follow from leaving them out. A snap that is too stiff cracks at the root on the first assembly; a snap that is too soft lets the panel rattle and leaks at the perimeter. Neither shows up in a photograph of a sample, which is why an assembly trial with force measurement is worth more than a visual approval. Housing and panel share a datum - usually a housing edge or a fixing boss - so key positions are referenced to the same origin on both parts. Someone has to own the sum. When the housing and the keypad come from two suppliers, nobody does, and the gap is discovered at assembly. First articles assembled together, with the key force and the perimeter gap measured. A photo of each part separately proves nothing. This is the main commercial argument for buying the pair: a housing programme on its own needs a keypad to validate against, and a keypad programme needs a housing. Supplying both removes the argument about whose tolerance caused the misfit. One key is stiff. Hole position or key moulding, not the snap. Check the gap on all four sides of that key before touching the housing. The panel rocks. Seat land is not flat, or the snap does not pull the panel down evenly. Add a retention feature near the middle of a long panel. Keys rattle. Undercut too shallow or the panel flange is thinner than the space it sits in. Both are dimensions, not assembly technique. The seal weeps at one corner. The land is interrupted, often by a screw boss or a rib that was added late. Housing design without a keypad is covered under lightweight plastic shells and enclosures for electronics. For the panel itself, see instrument keypads. Yes, and it is common: send the keypad with its 2D drawing, and the housing is designed around its seat height and key positions. The reverse also works - a housing already in production can be matched with a new panel. It is a design figure, not a material property. State the service access count, and the arm geometry is sized for it. A housing intended to be opened twice a year and one opened weekly should not share a snap design. It can, and for a sealed unit it should - the perimeter compression is set at assembly. If you assemble in-house, send the assembly instruction with the torque and the snap engagement check. Two tools, not one: housing and panel. Housing complexity - snaps, ribs, bosses, side actions - usually dominates, which is why simplifying the housing is the fastest way to reduce the entry cost. Seat height, key alignment and seal land are one chain, so the two parts should be quoted together. Send the panel drawing or the enclosure envelope, and we will return a housing proposal with the assembly interfaces dimensioned.A snap-fit housing is not a box around a keypad - it is the other half of the switch
Three interfaces decide whether assembly is "perfect"
Seat, alignment and seal

Snap-fit is a spring, and springs are dimensioned
What to put on the snap drawing

Tool both parts from one datum
One drawing set
One tolerance owner
One assembly trial
Where assemblies fail, and which part to change
Four symptoms, four causes

Specification on this kit
Questions from mechanical designers
Can you supply the housing to fit our existing keypad?
How many times can the snap be opened?
Does the kit come assembled?
What drives the tooling cost?
Send the keypad, or the space it has to fit